
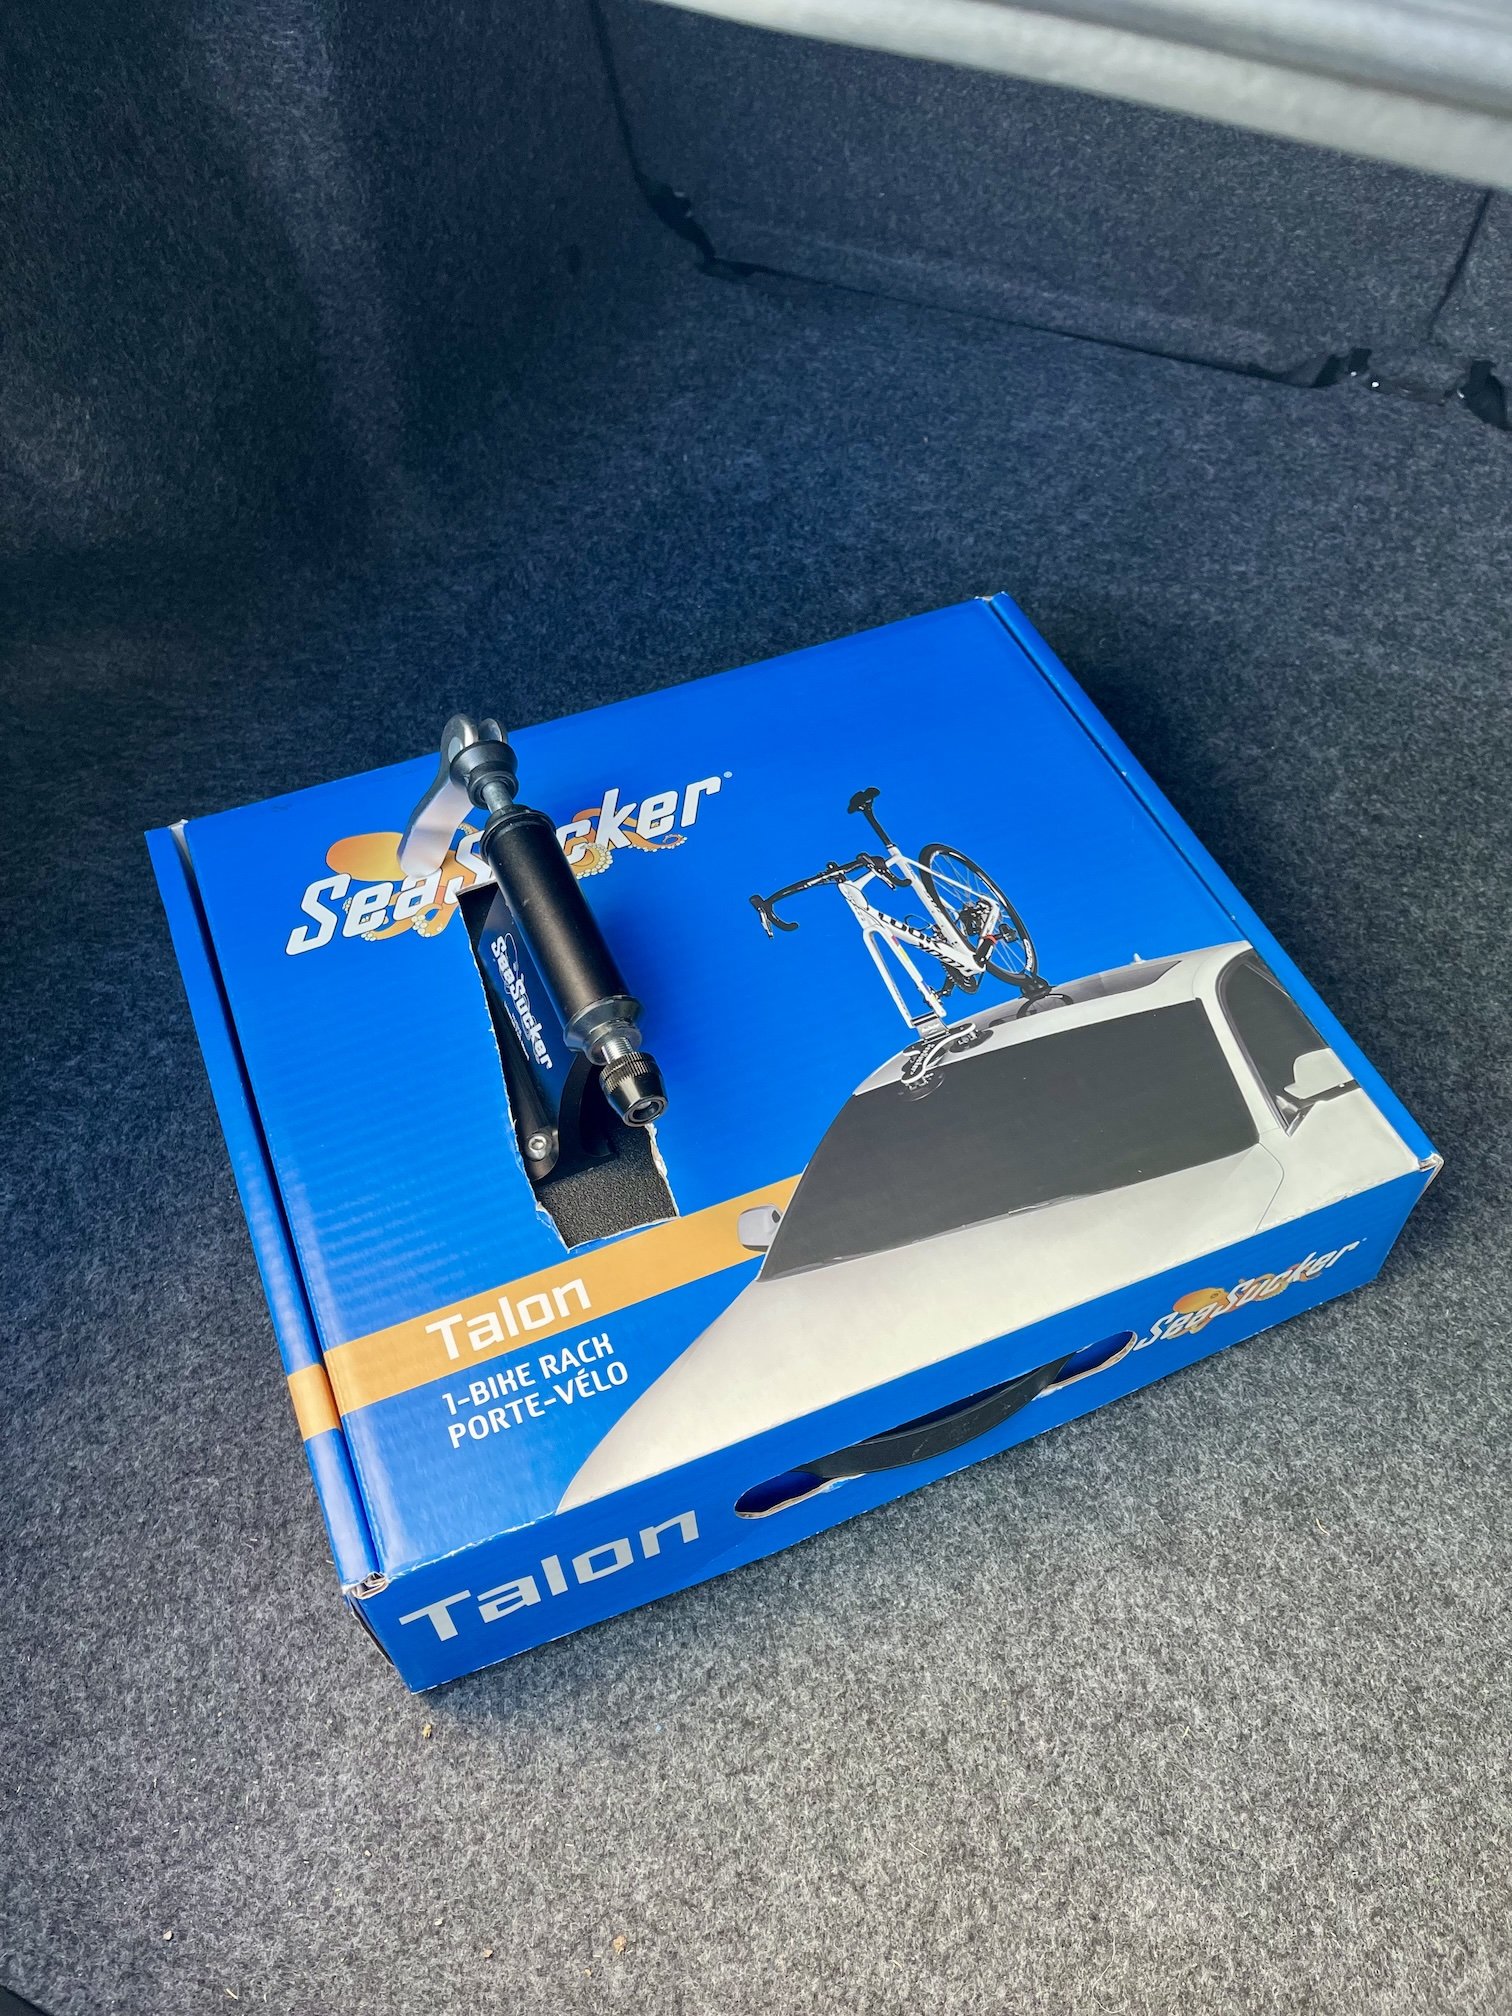
SeaSucker Talon 1-Bike Review
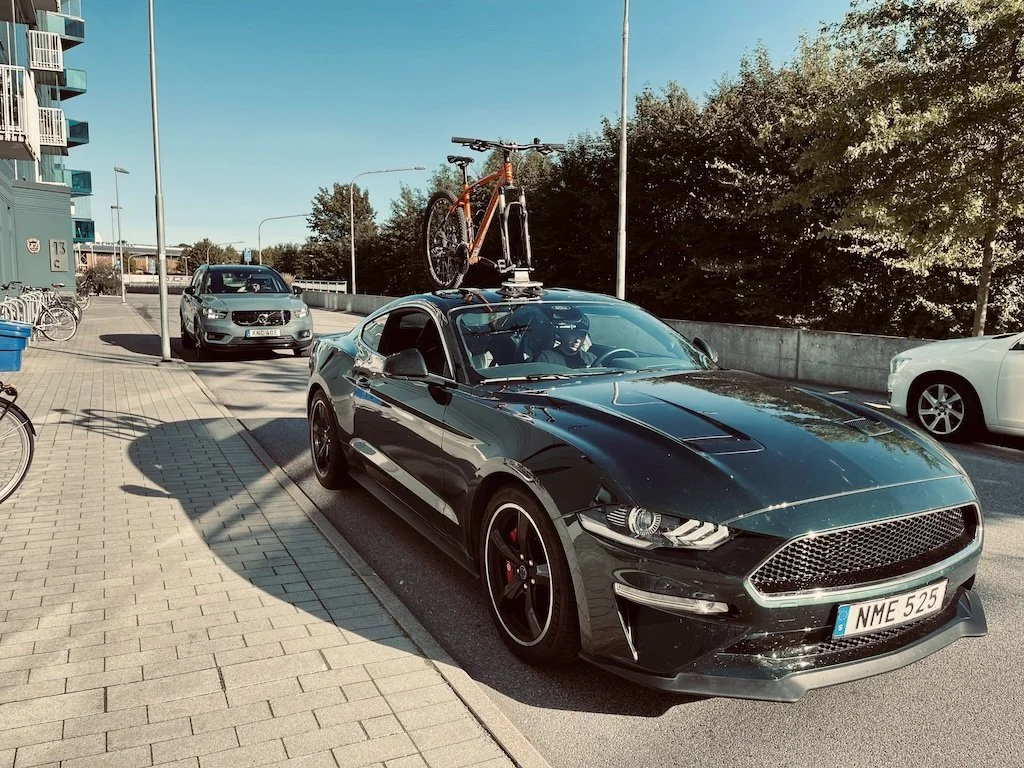
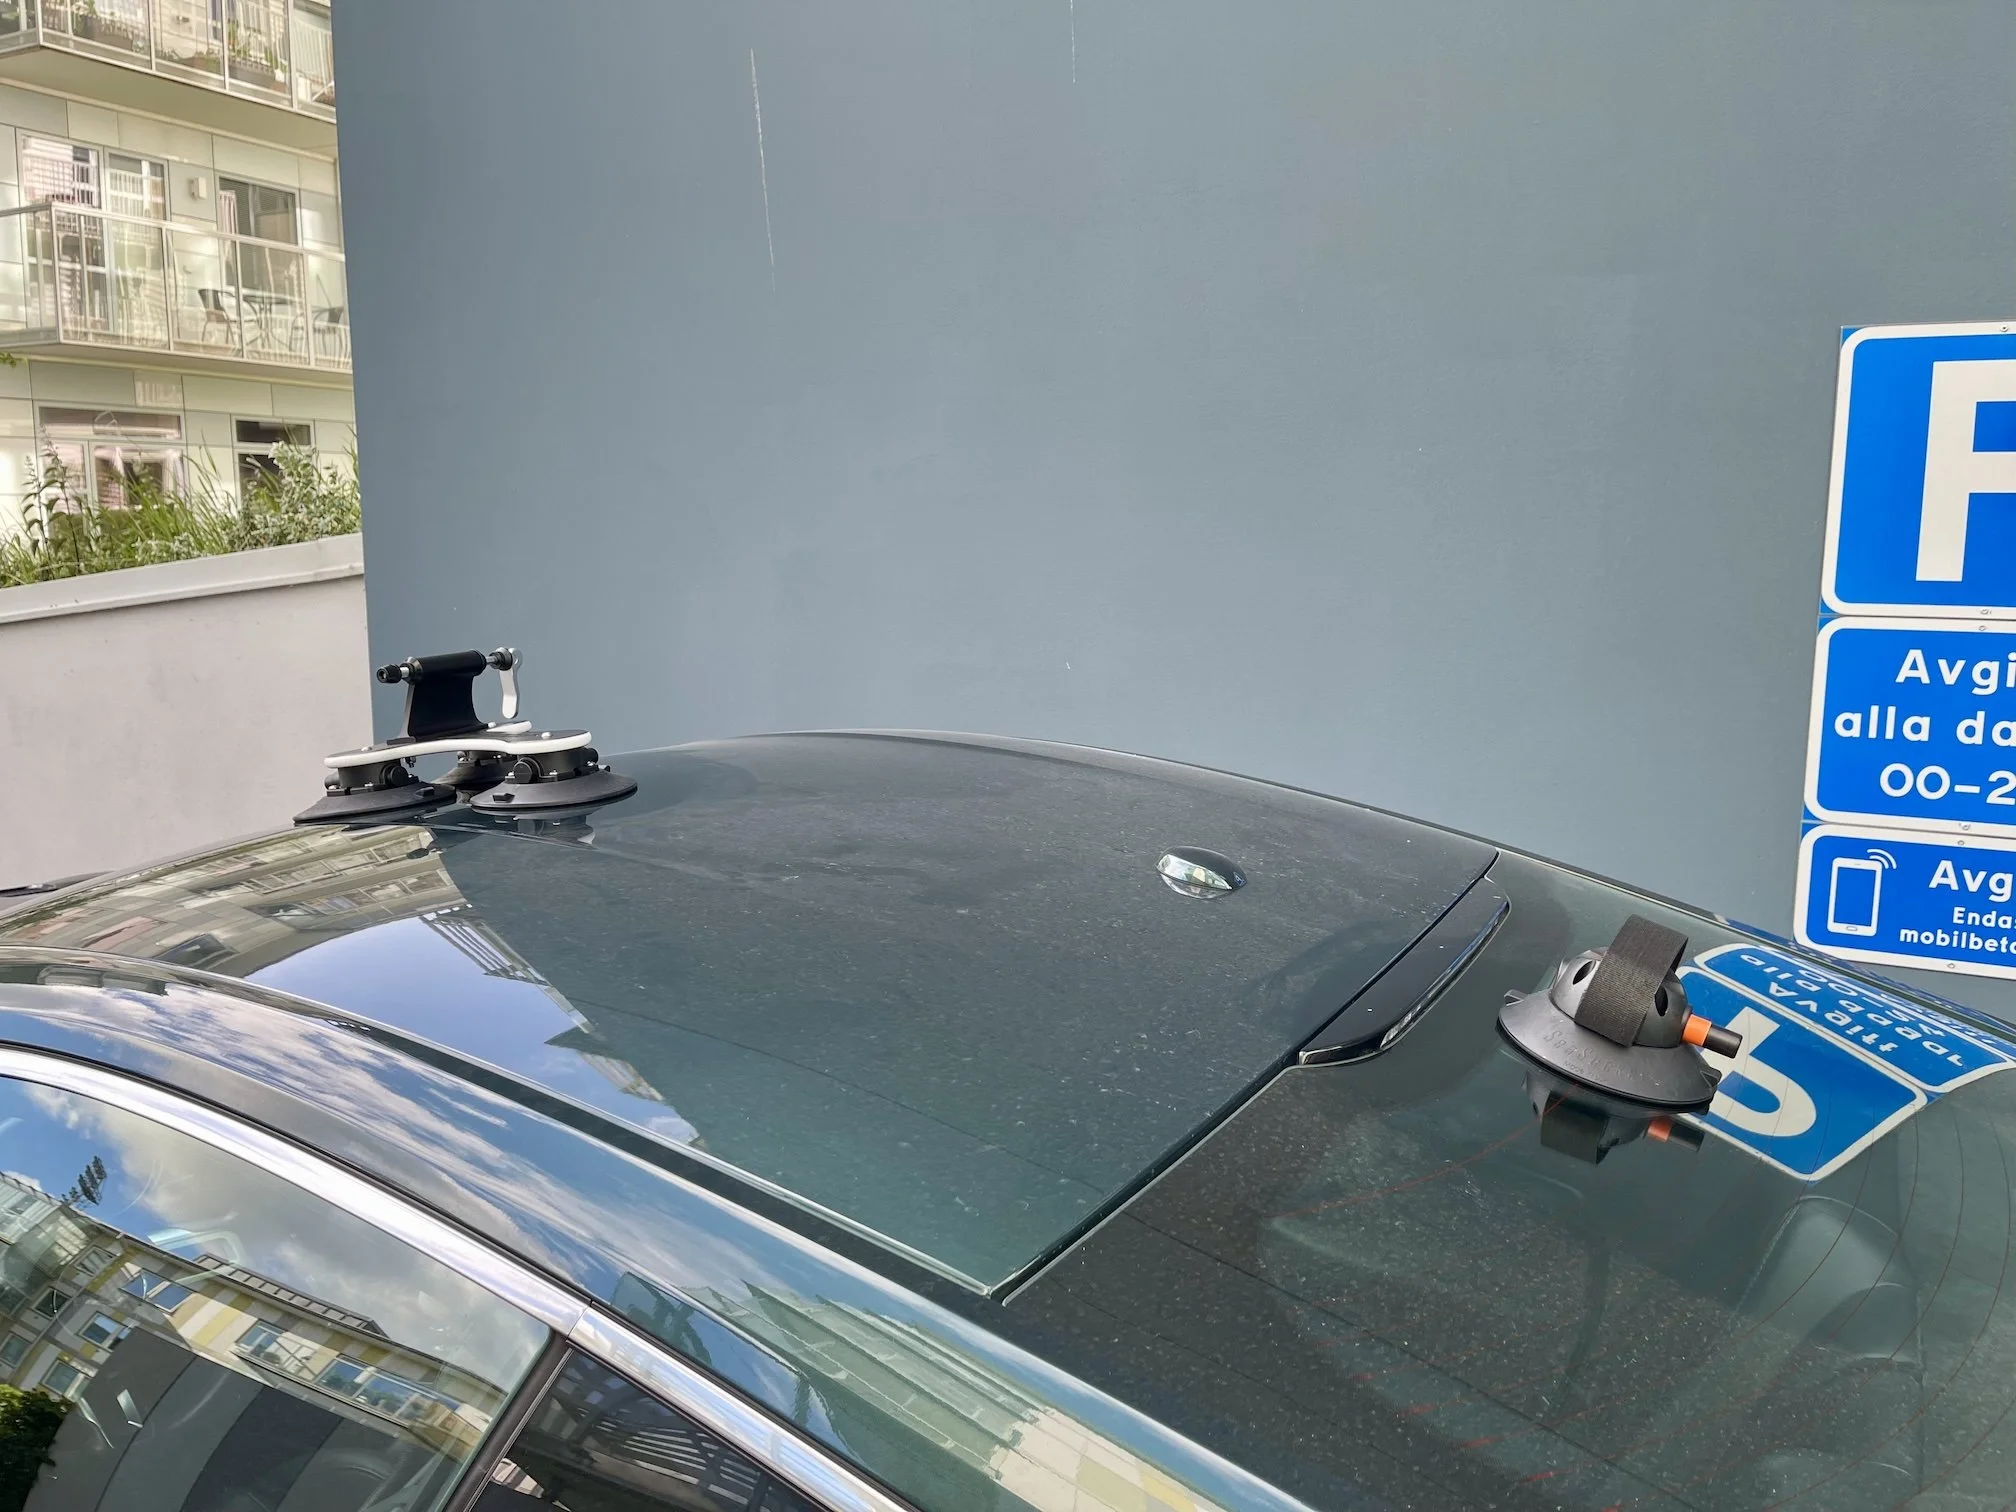
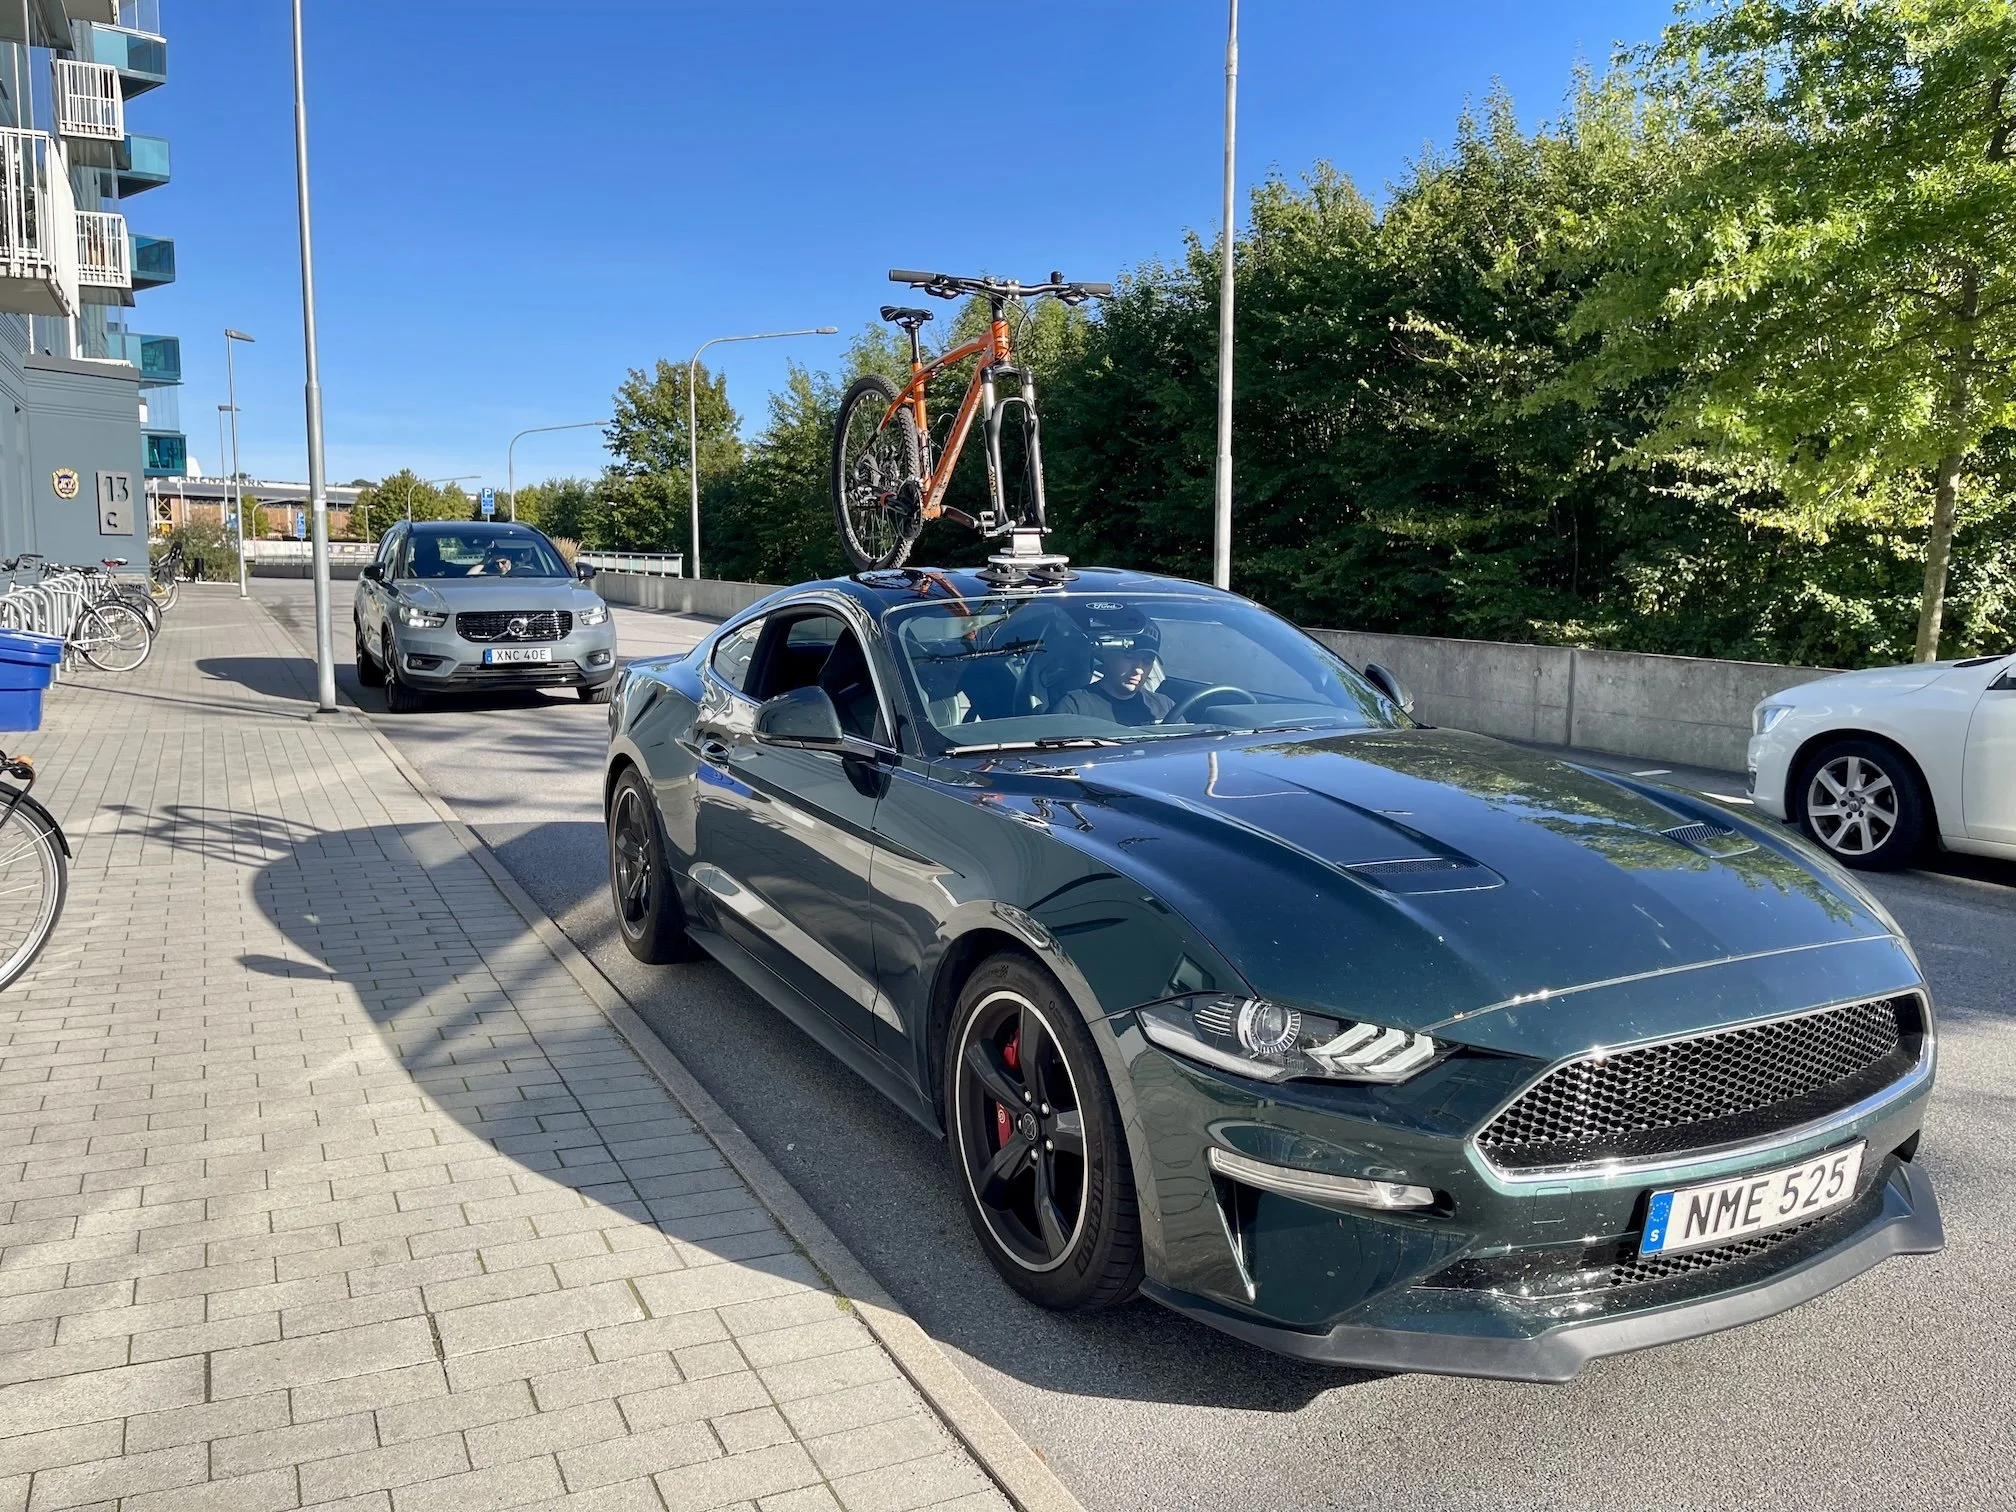
SeaSucker Talon mounted on my Mustang Bullitt.
After using the SeaSucker Talon on highways, curvy country roads, speed bumps, elevation changes, and city driving, my short verdict is this: it has worked reliably for me so far, it’s convenient, and it saves a lot of time, but it also takes some trust to use.
Disclosure: I bought the SeaSucker Talon myself and I later built Kraken Rack Monitor after using it.
Quick take
Summary
Pros
- Fast to mount and unmount
- High coolness factor
- Not permanent
- Easy to store
- Works well on cars where roof bars or hitch racks are not an option
Cons
- Can feel scary to drive with
- You can’t see the vacuum indicators while driving
- You need to lift the bike higher than with a hitch rack
- Mounting the bike takes some care if you don’t want to scratch the car
- Not lockable, so I wouldn’t leave it unattended for long
Where I’ve used it: Highways, curvy country roads, speed bumps, elevation changes, and city driving.
What I like: It’s not permanent, it’s fast to use, and the whole concept is very cool.
What I don’t like: It can be a bit nerve-racking while driving, especially in the beginning, and mounting the bike safely takes more effort than a hitch rack.
Why I bought it
Up until last fall, I had never heard about SeaSucker and didn’t know vacuum-mounted racks were even a thing. The whole idea sounded crazy to me, and still kind of does.
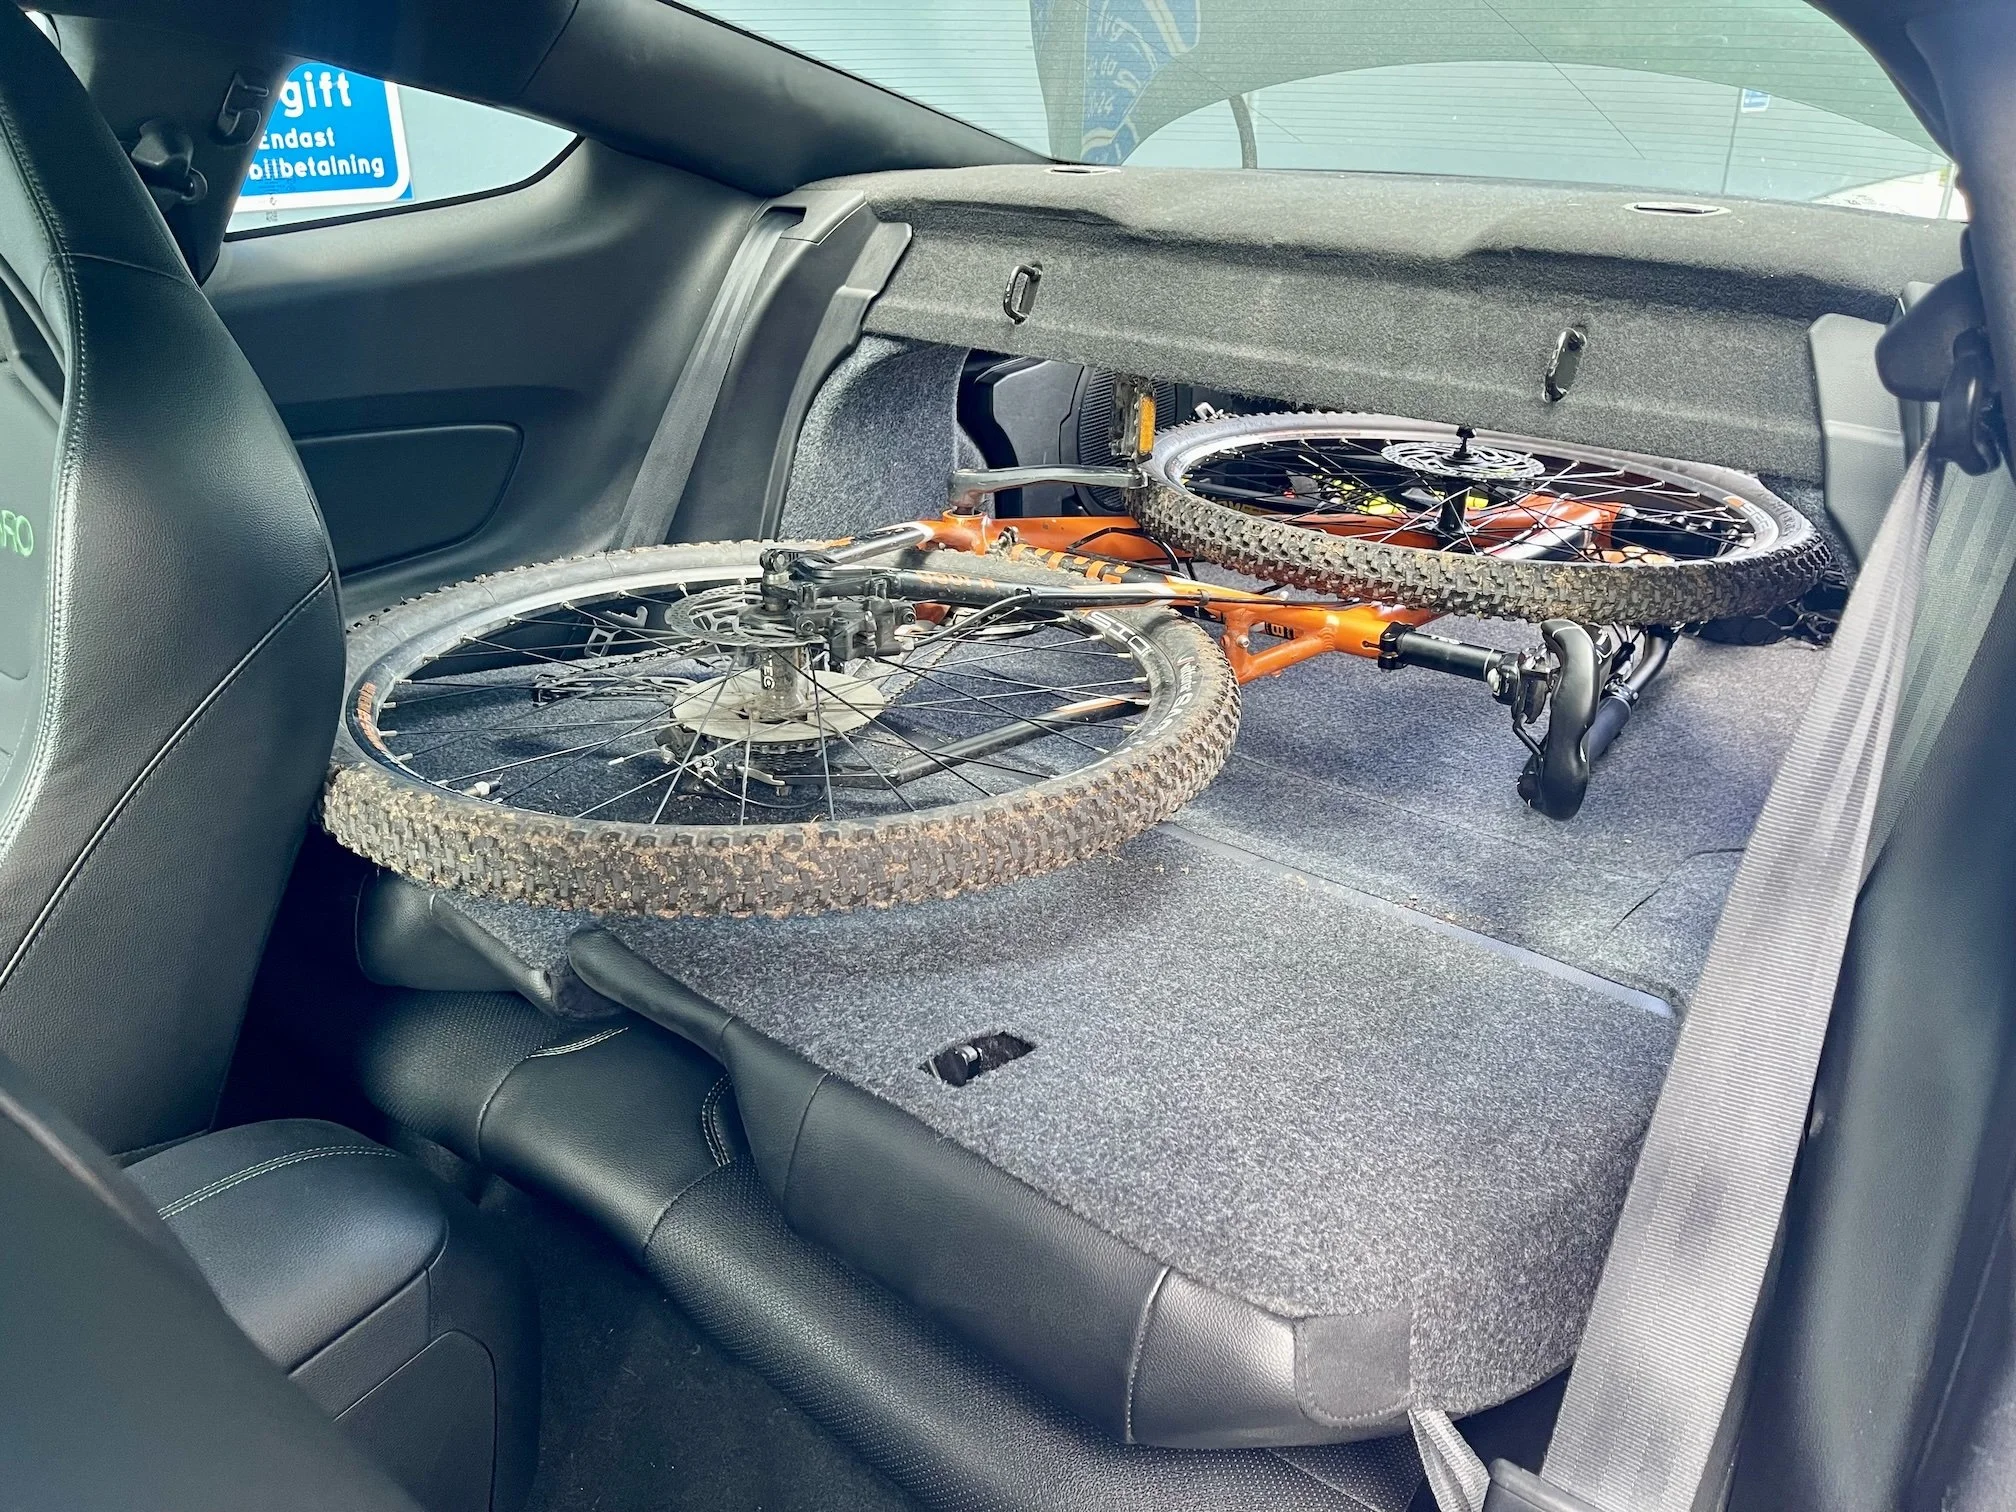
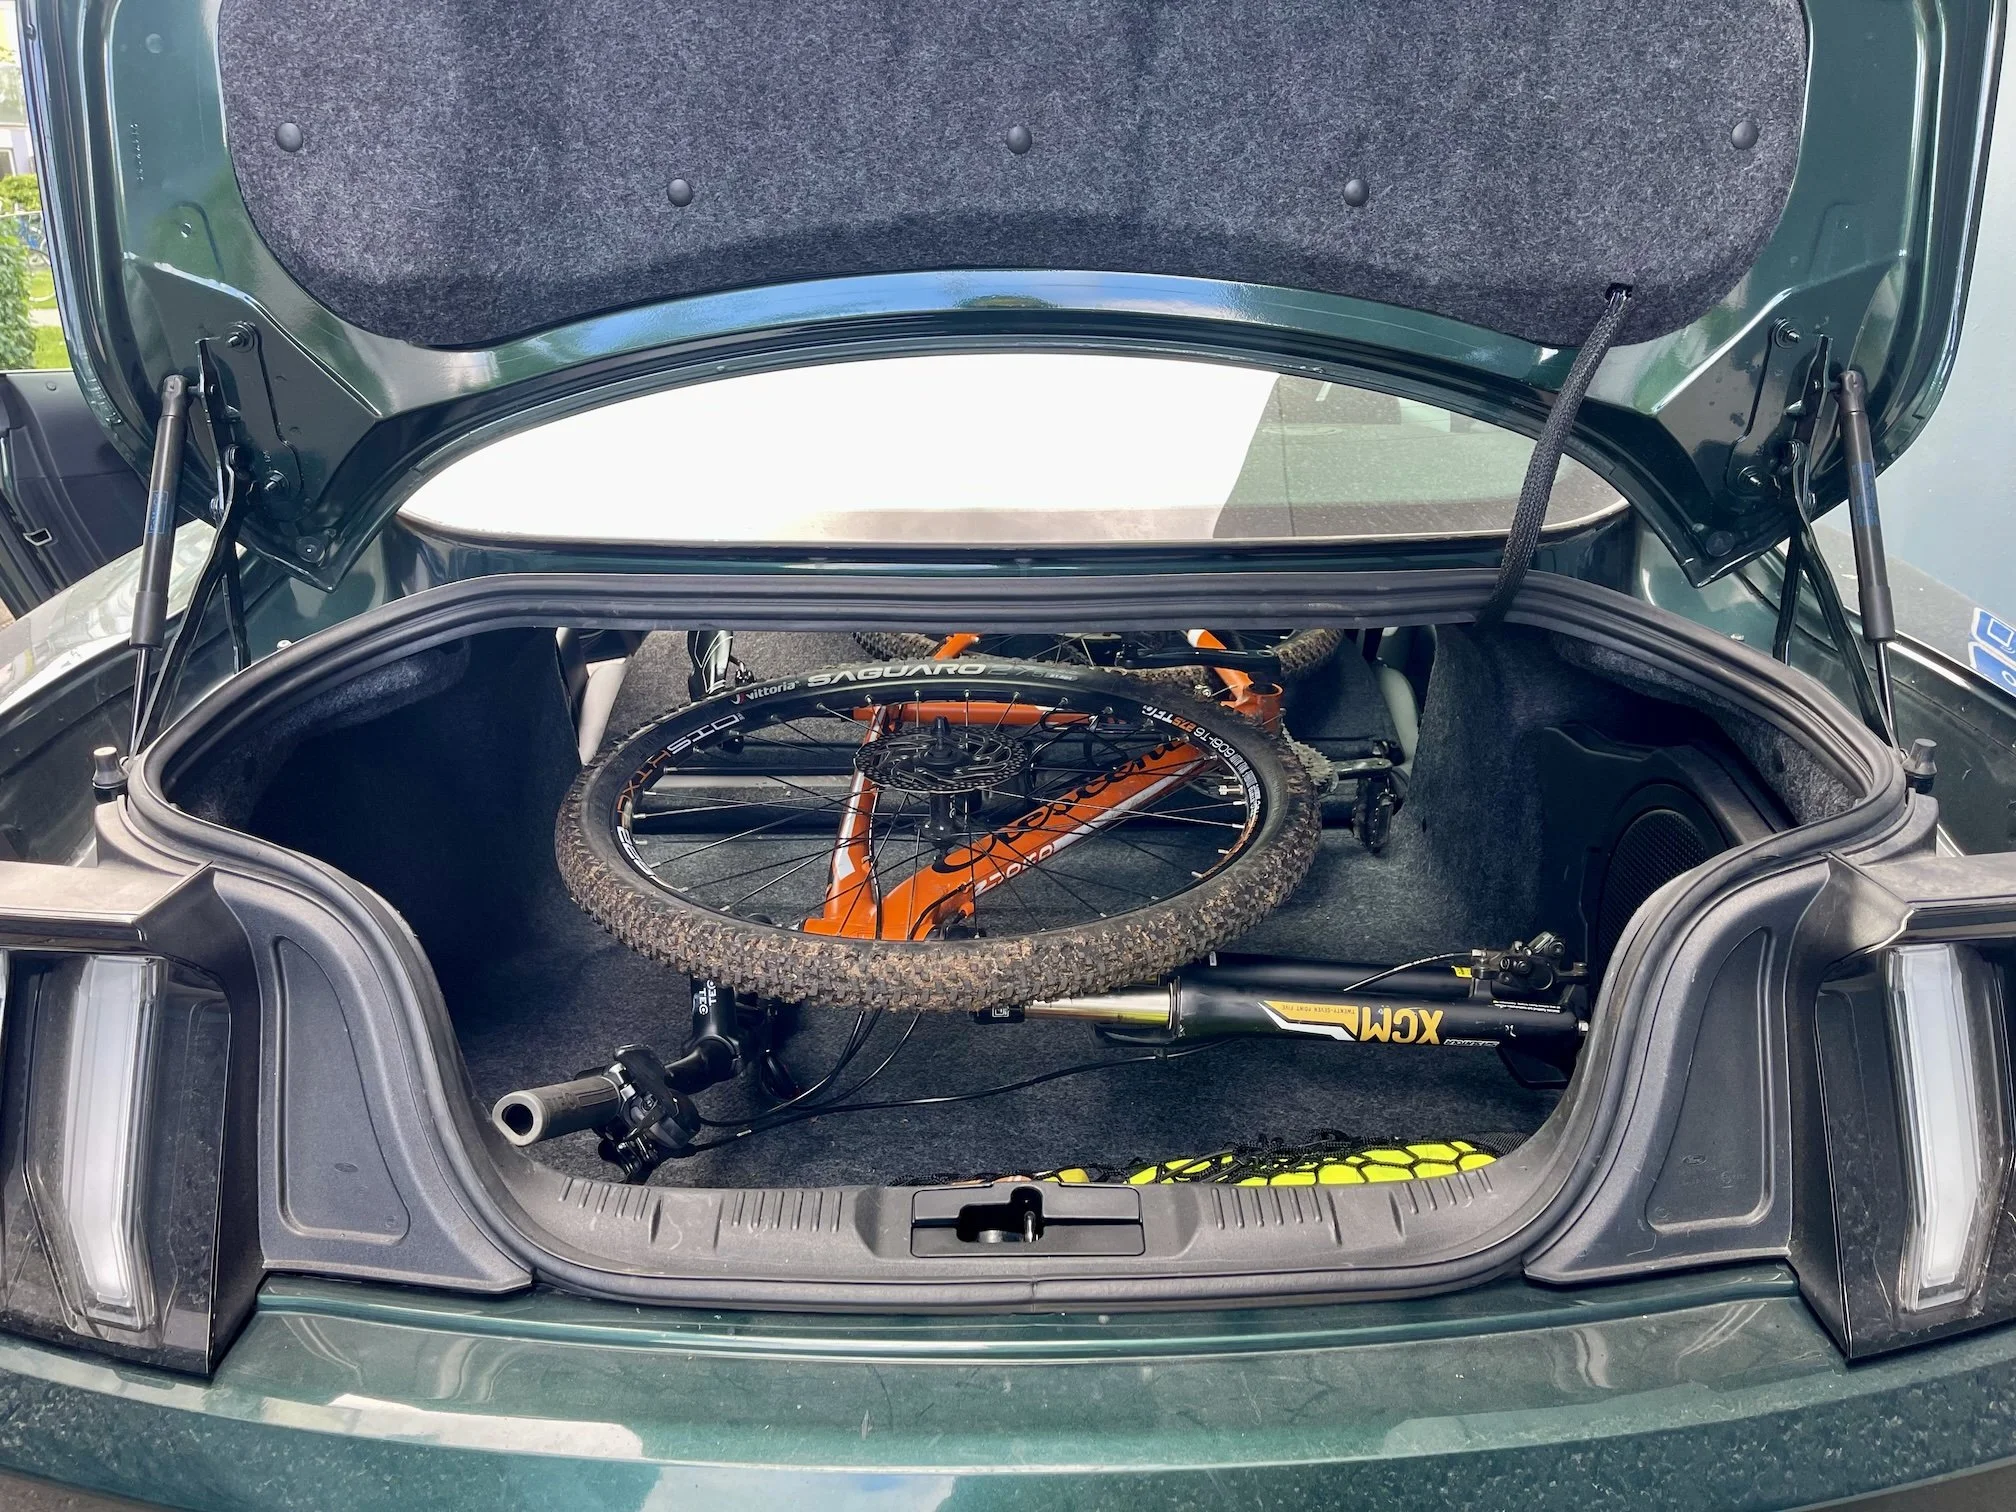
It started when I was looking for some type of bike rack for my Mustang Bullitt. I had been using the Mustang to go mountain biking for a couple of summers, transporting the bike in the trunk by folding down the back seats. It worked, but it was time-consuming, tricky, and always left dirt, scratches, and marks on the interior of the car. I could also only carry one bike, and it didn’t leave much space for anything else.
So at the end of last summer, after a few mountain bike trips, I started Googling for bike racks for Mustangs. My first thought was to see if I could install a tow hitch and use a hitch rack, but I also wanted to see if there were any other options, such as permanent roof bars. I wasn’t too excited about permanent roof bars though, since I didn’t really want to change the look of the car.
I quickly found out that installing a tow hitch on my car was not possible, and roof bars didn’t seem to be an option either. I did, however, stumble upon an old Reddit thread where someone recommended a SeaSucker rack. Like I said, it sounded insane at first, but people swore by them, and after reading more about them it seemed like a reliable and convenient solution.
Because of that, I ended up ordering a SeaSucker Talon 1-bike rack from their European website. I was super excited, but also nervous, to try it out.
What is a SeaSucker Talon?

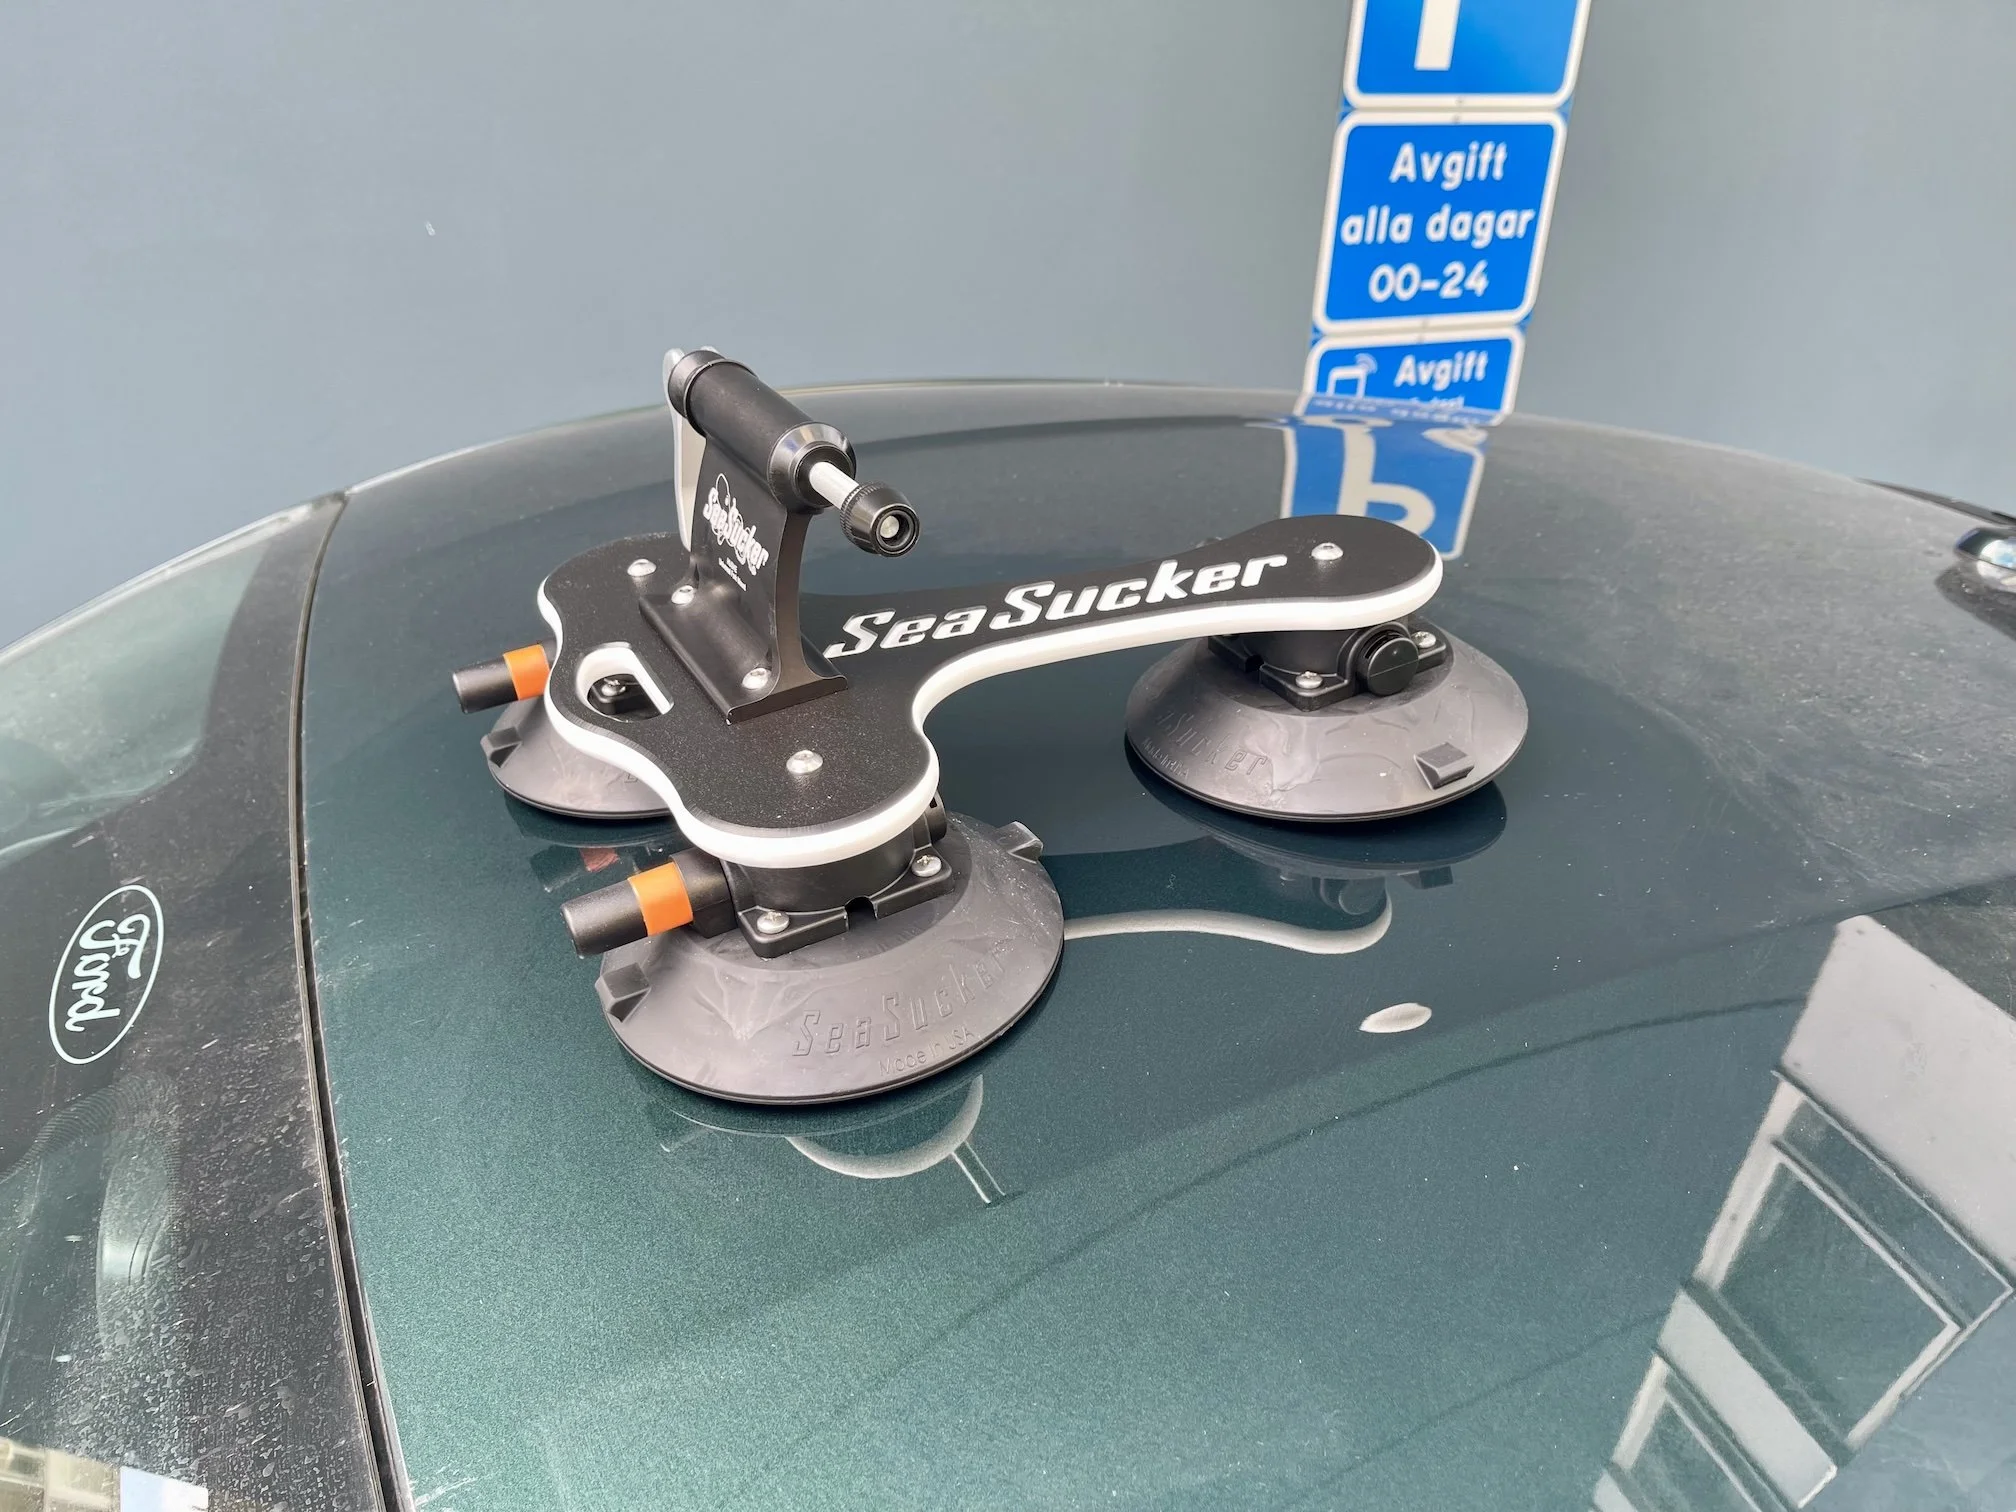
The SeaSucker Talon is a portable vacuum-mounted bike rack for one bike. Instead of attaching to roof bars or a hitch, it uses vacuum cups to mount directly to the car.
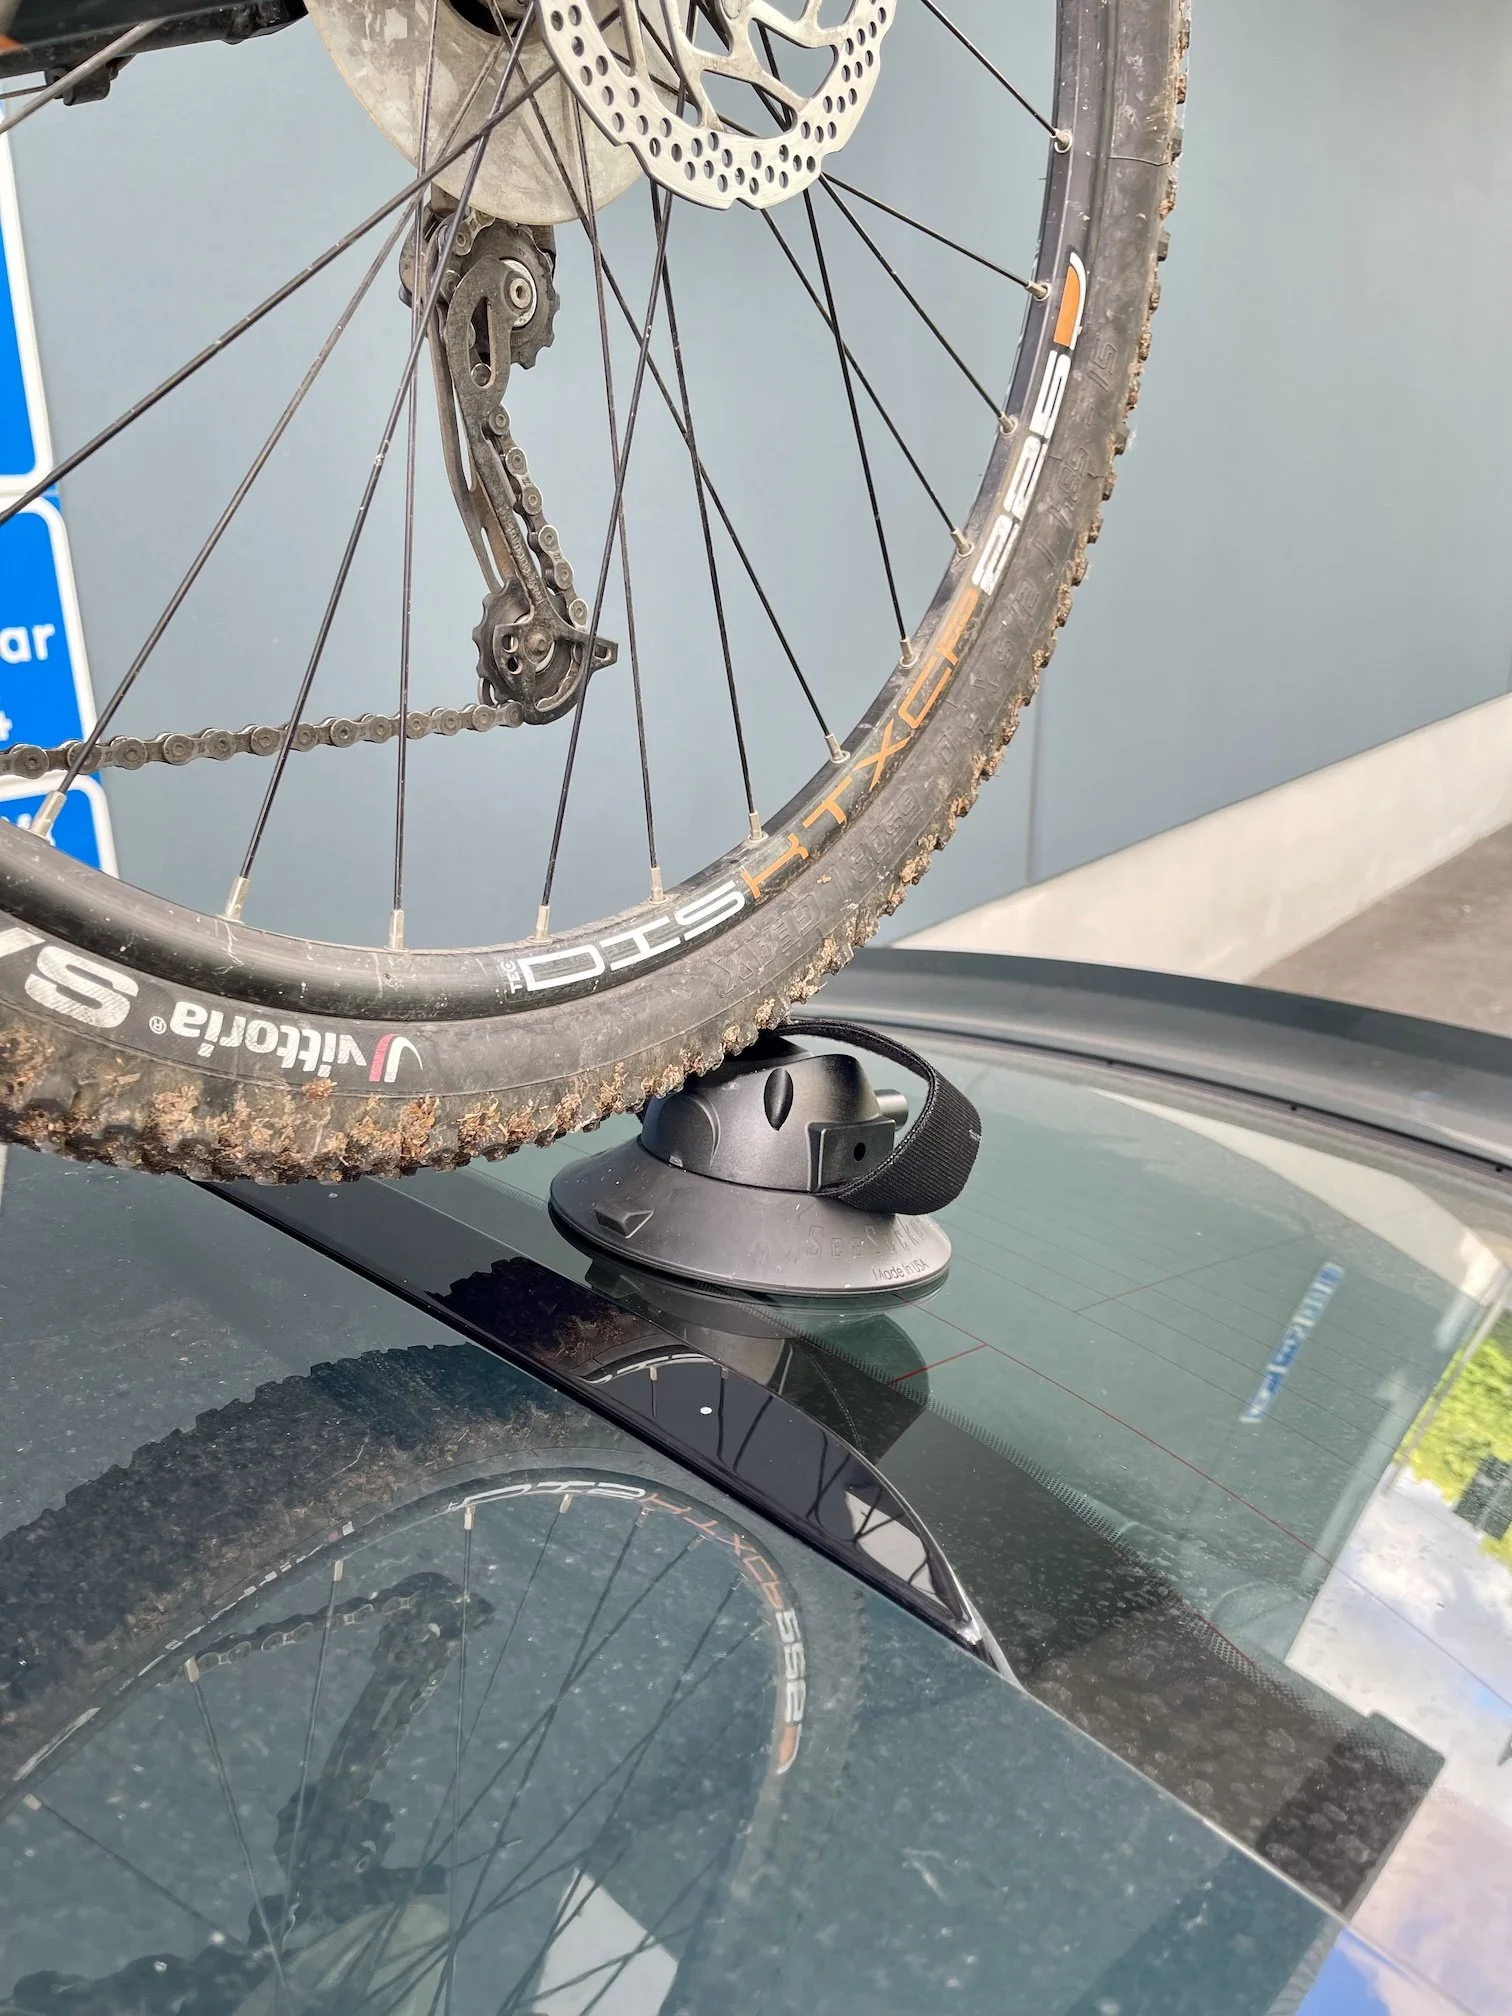
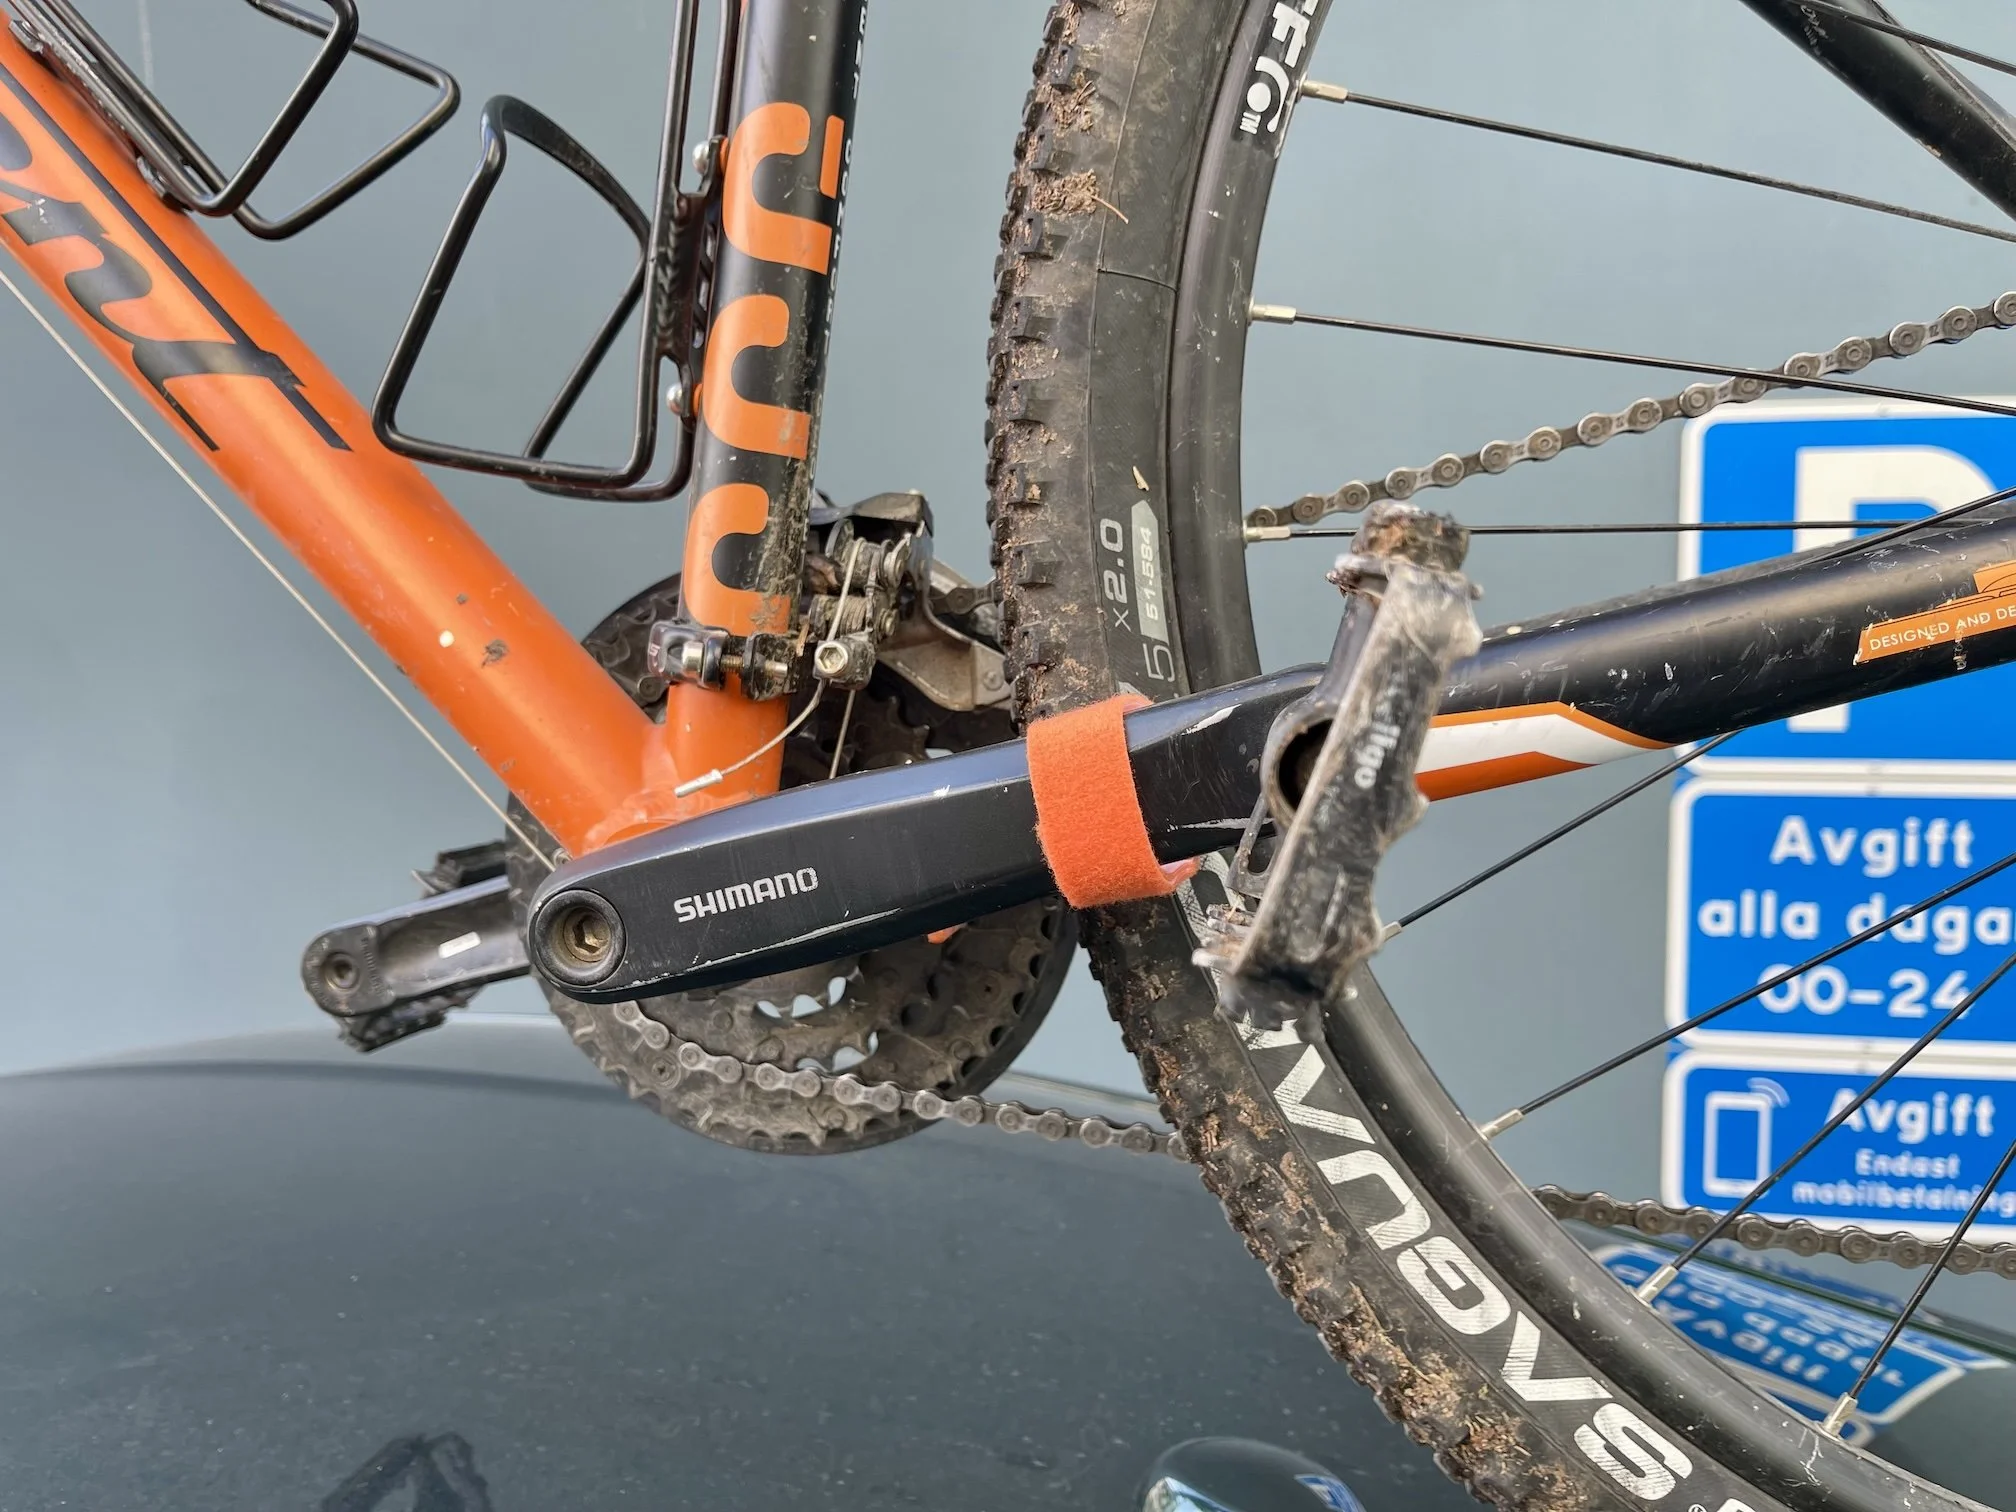
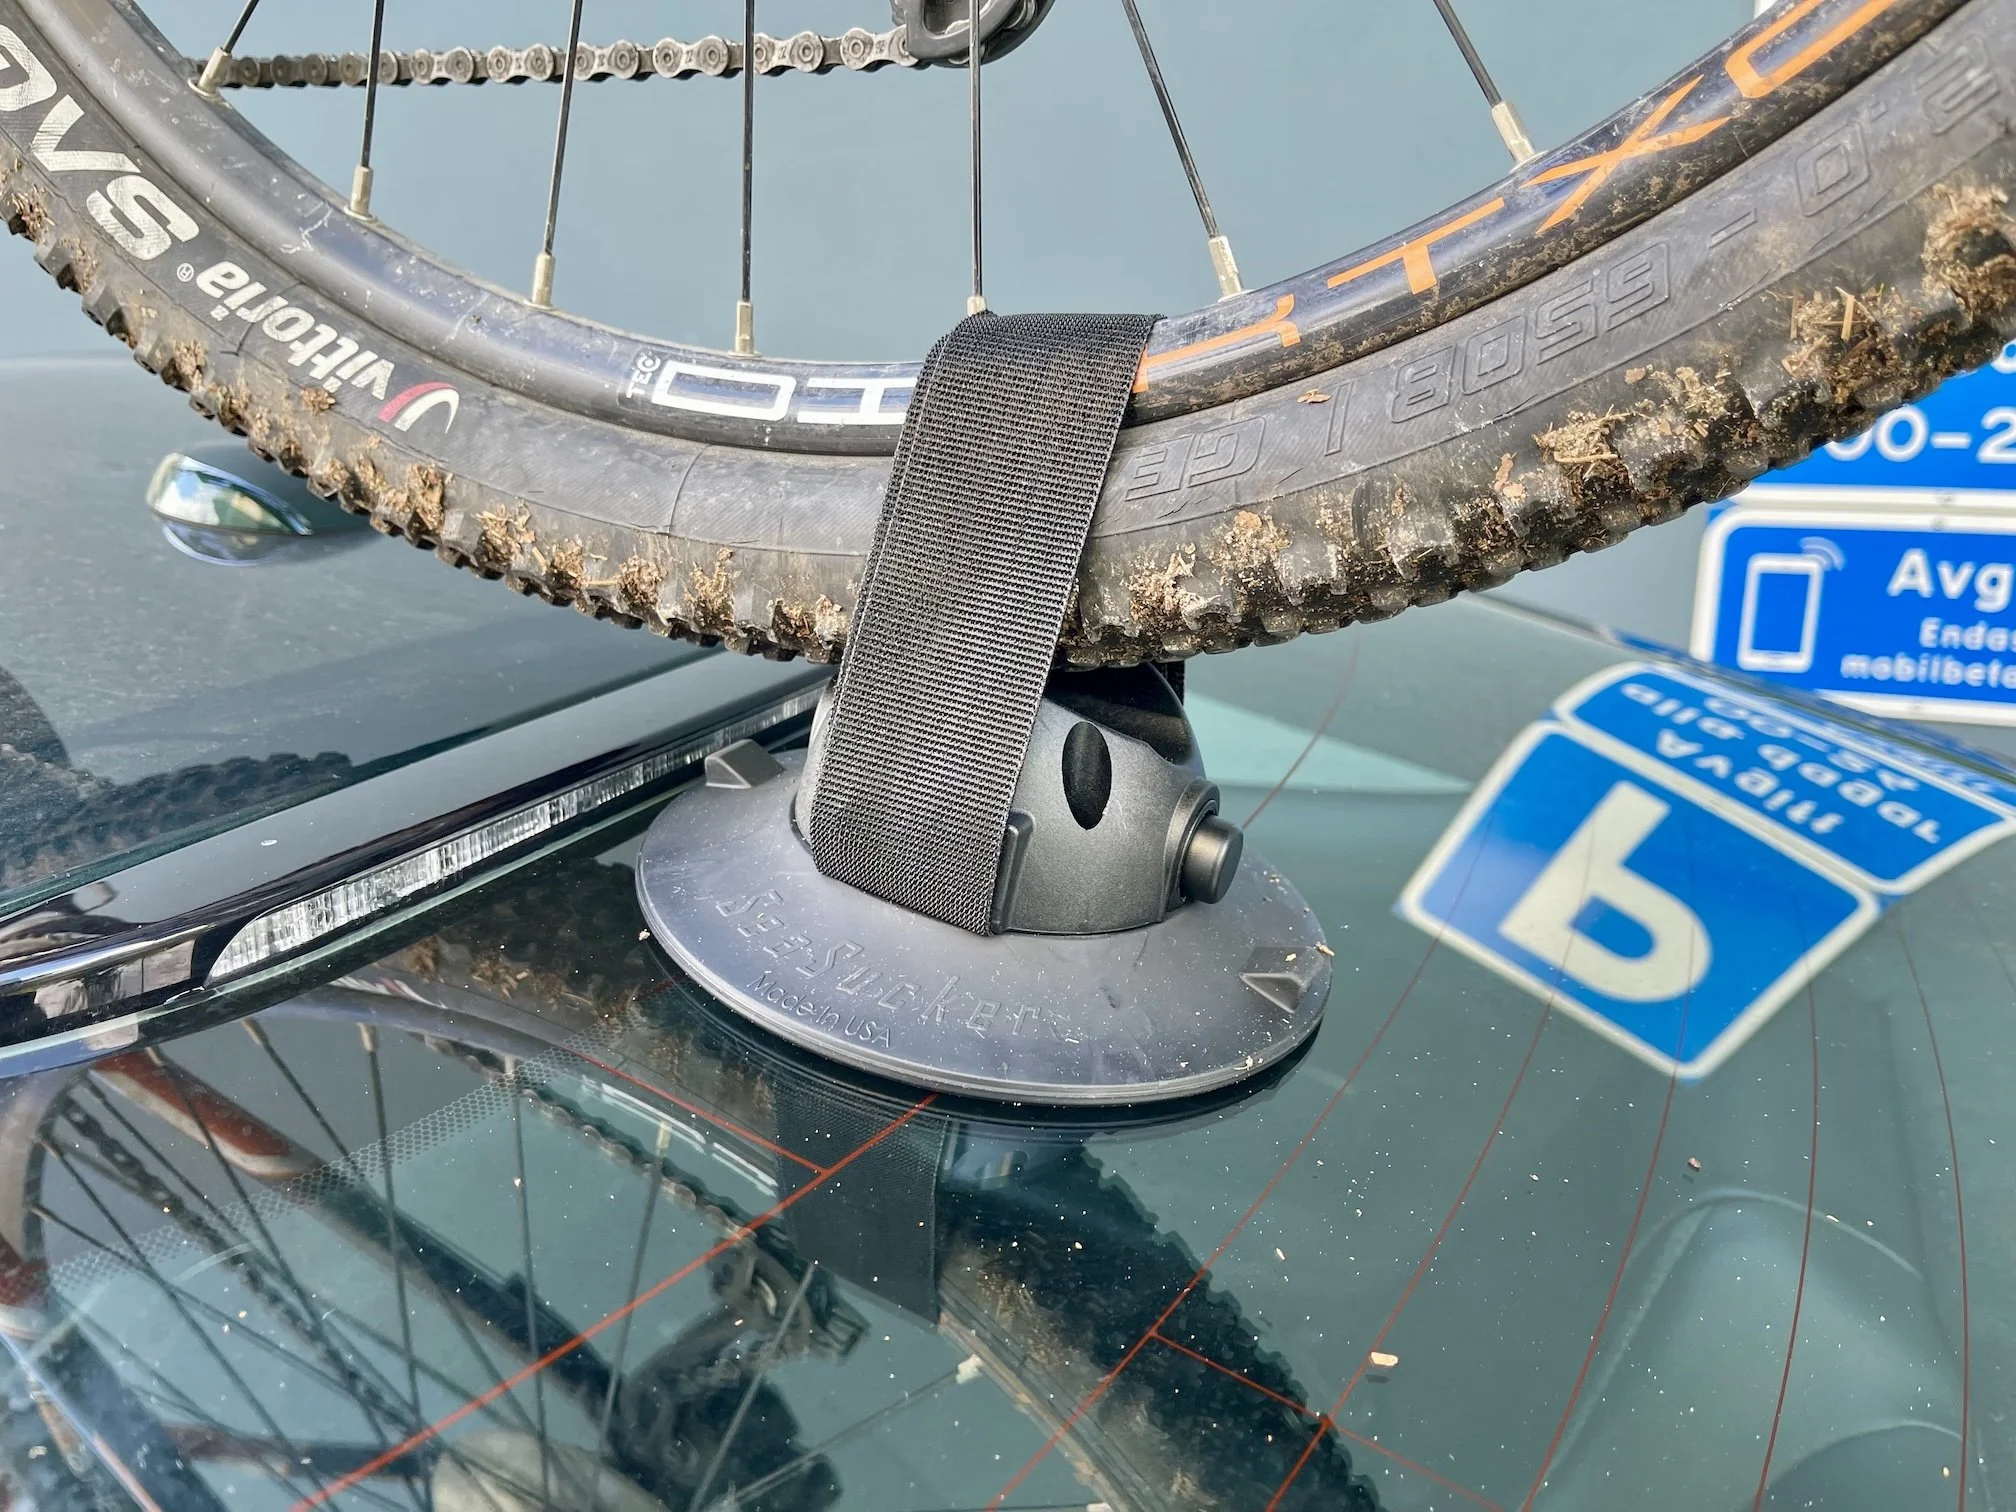
The bike is mounted by the front fork, so you remove the front wheel before putting the bike on the rack. The rear wheel is held in place by a separate vacuum-mounted rear wheel strap.
Because it doesn’t require permanent roof bars or a tow hitch, it can be a good option for cars where normal bike racks are either not possible or not desirable, especially sports cars.
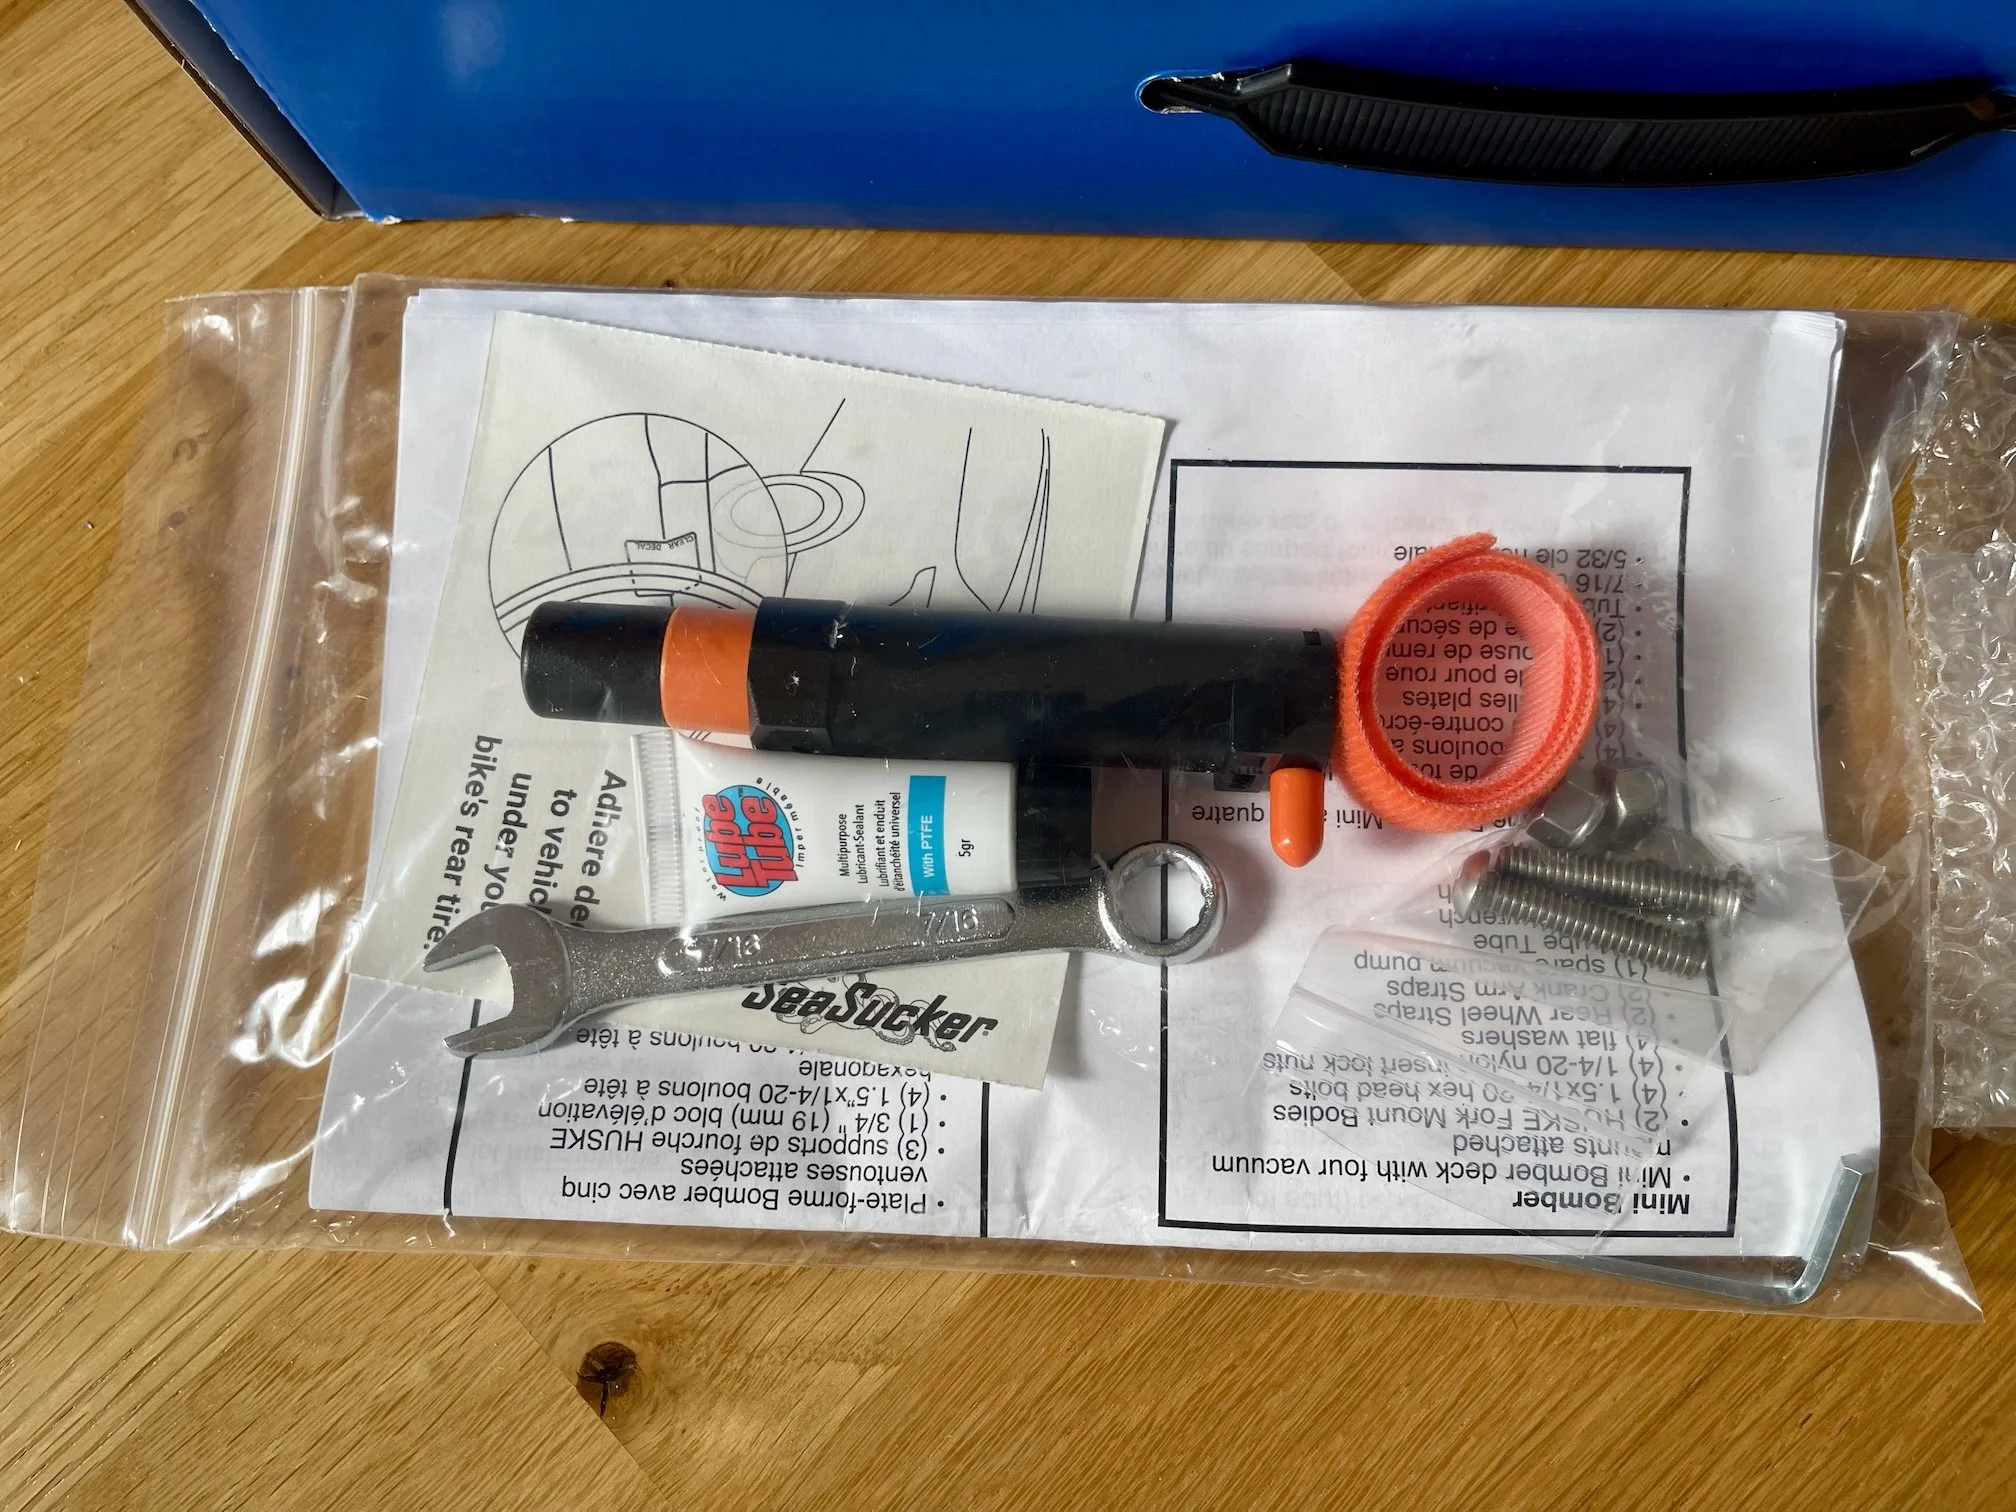
Unboxing
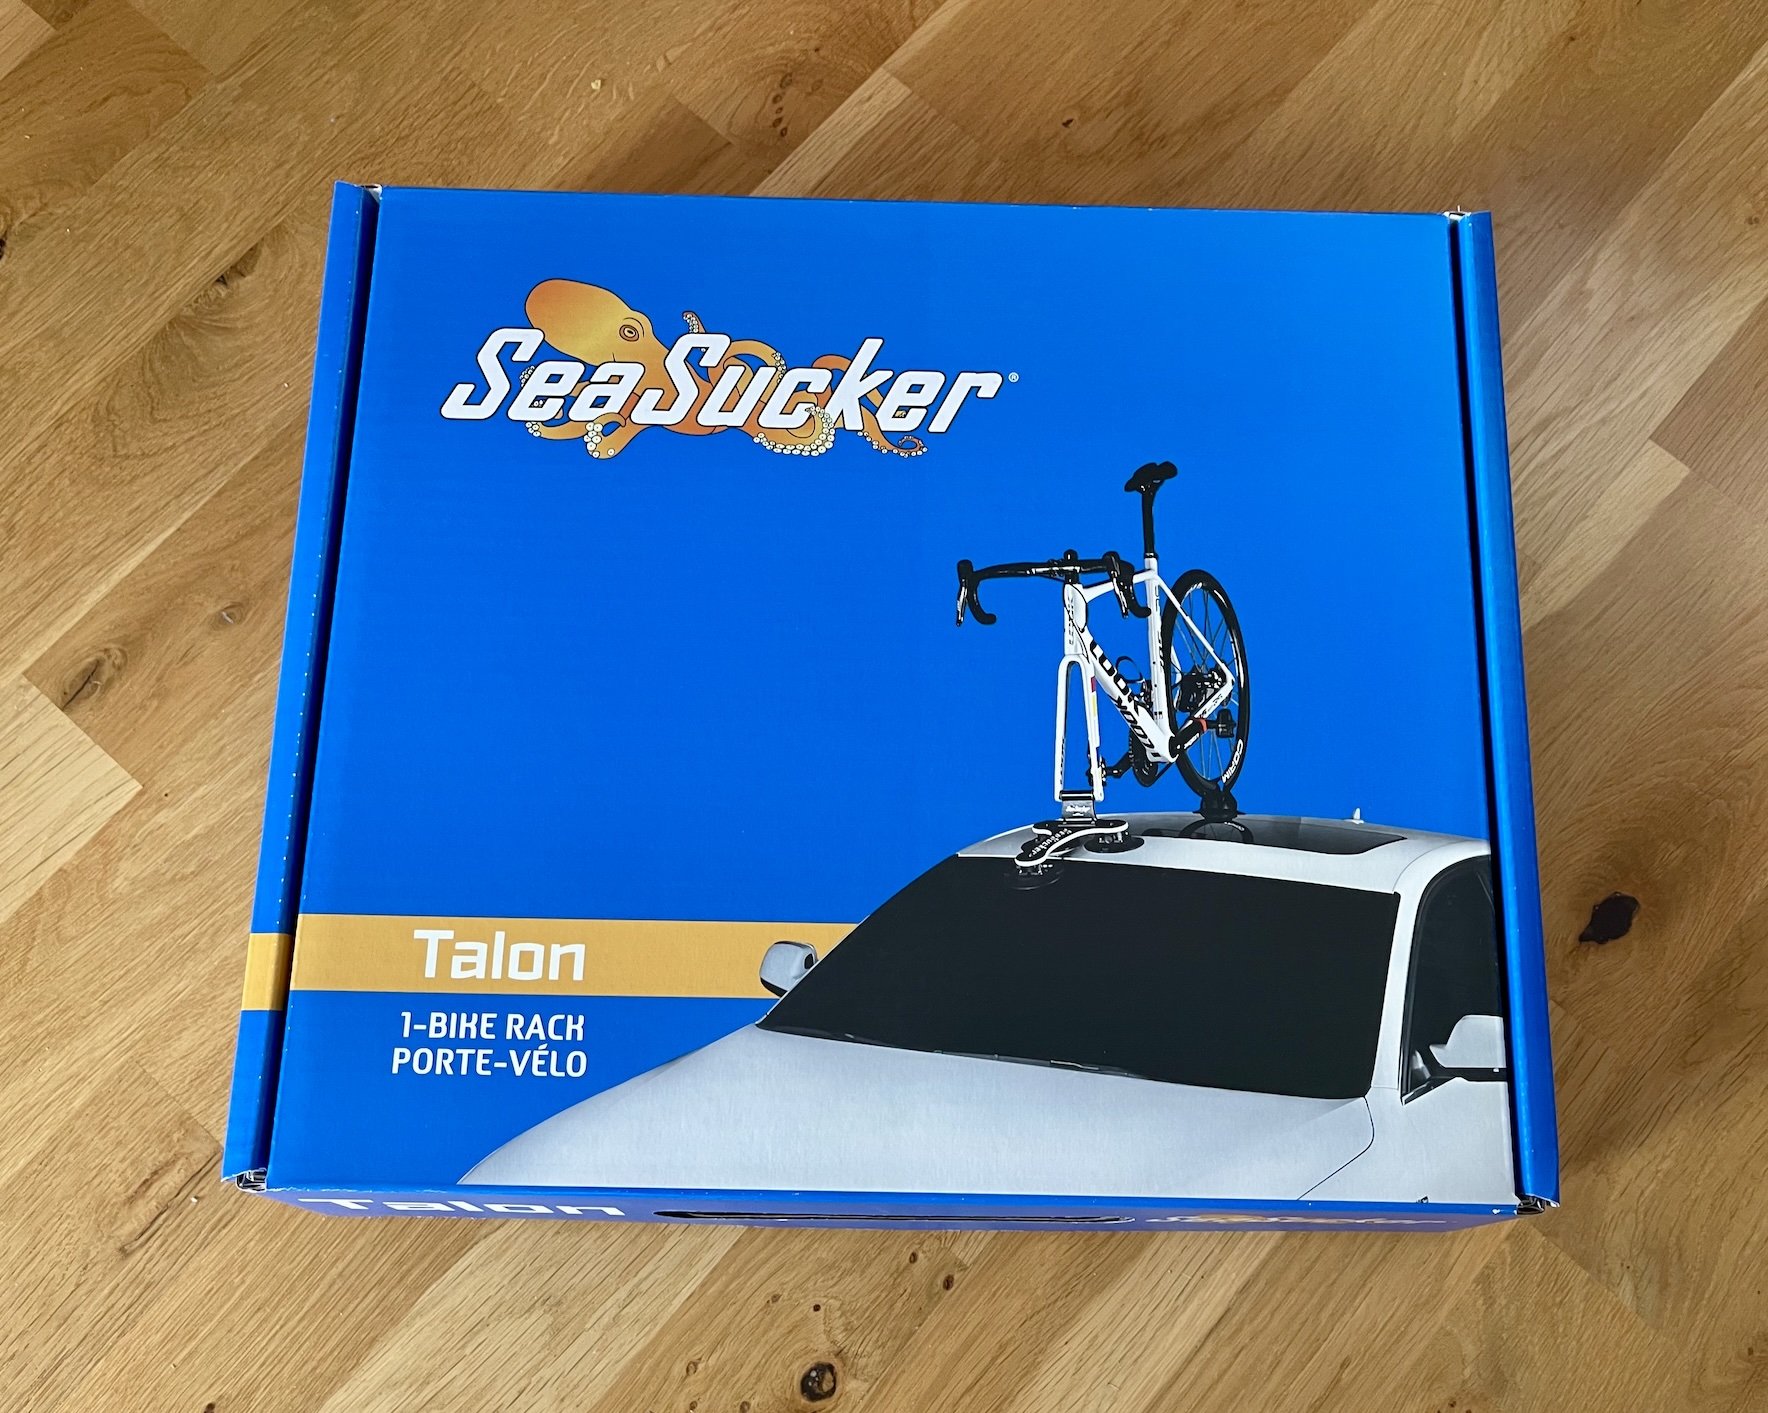
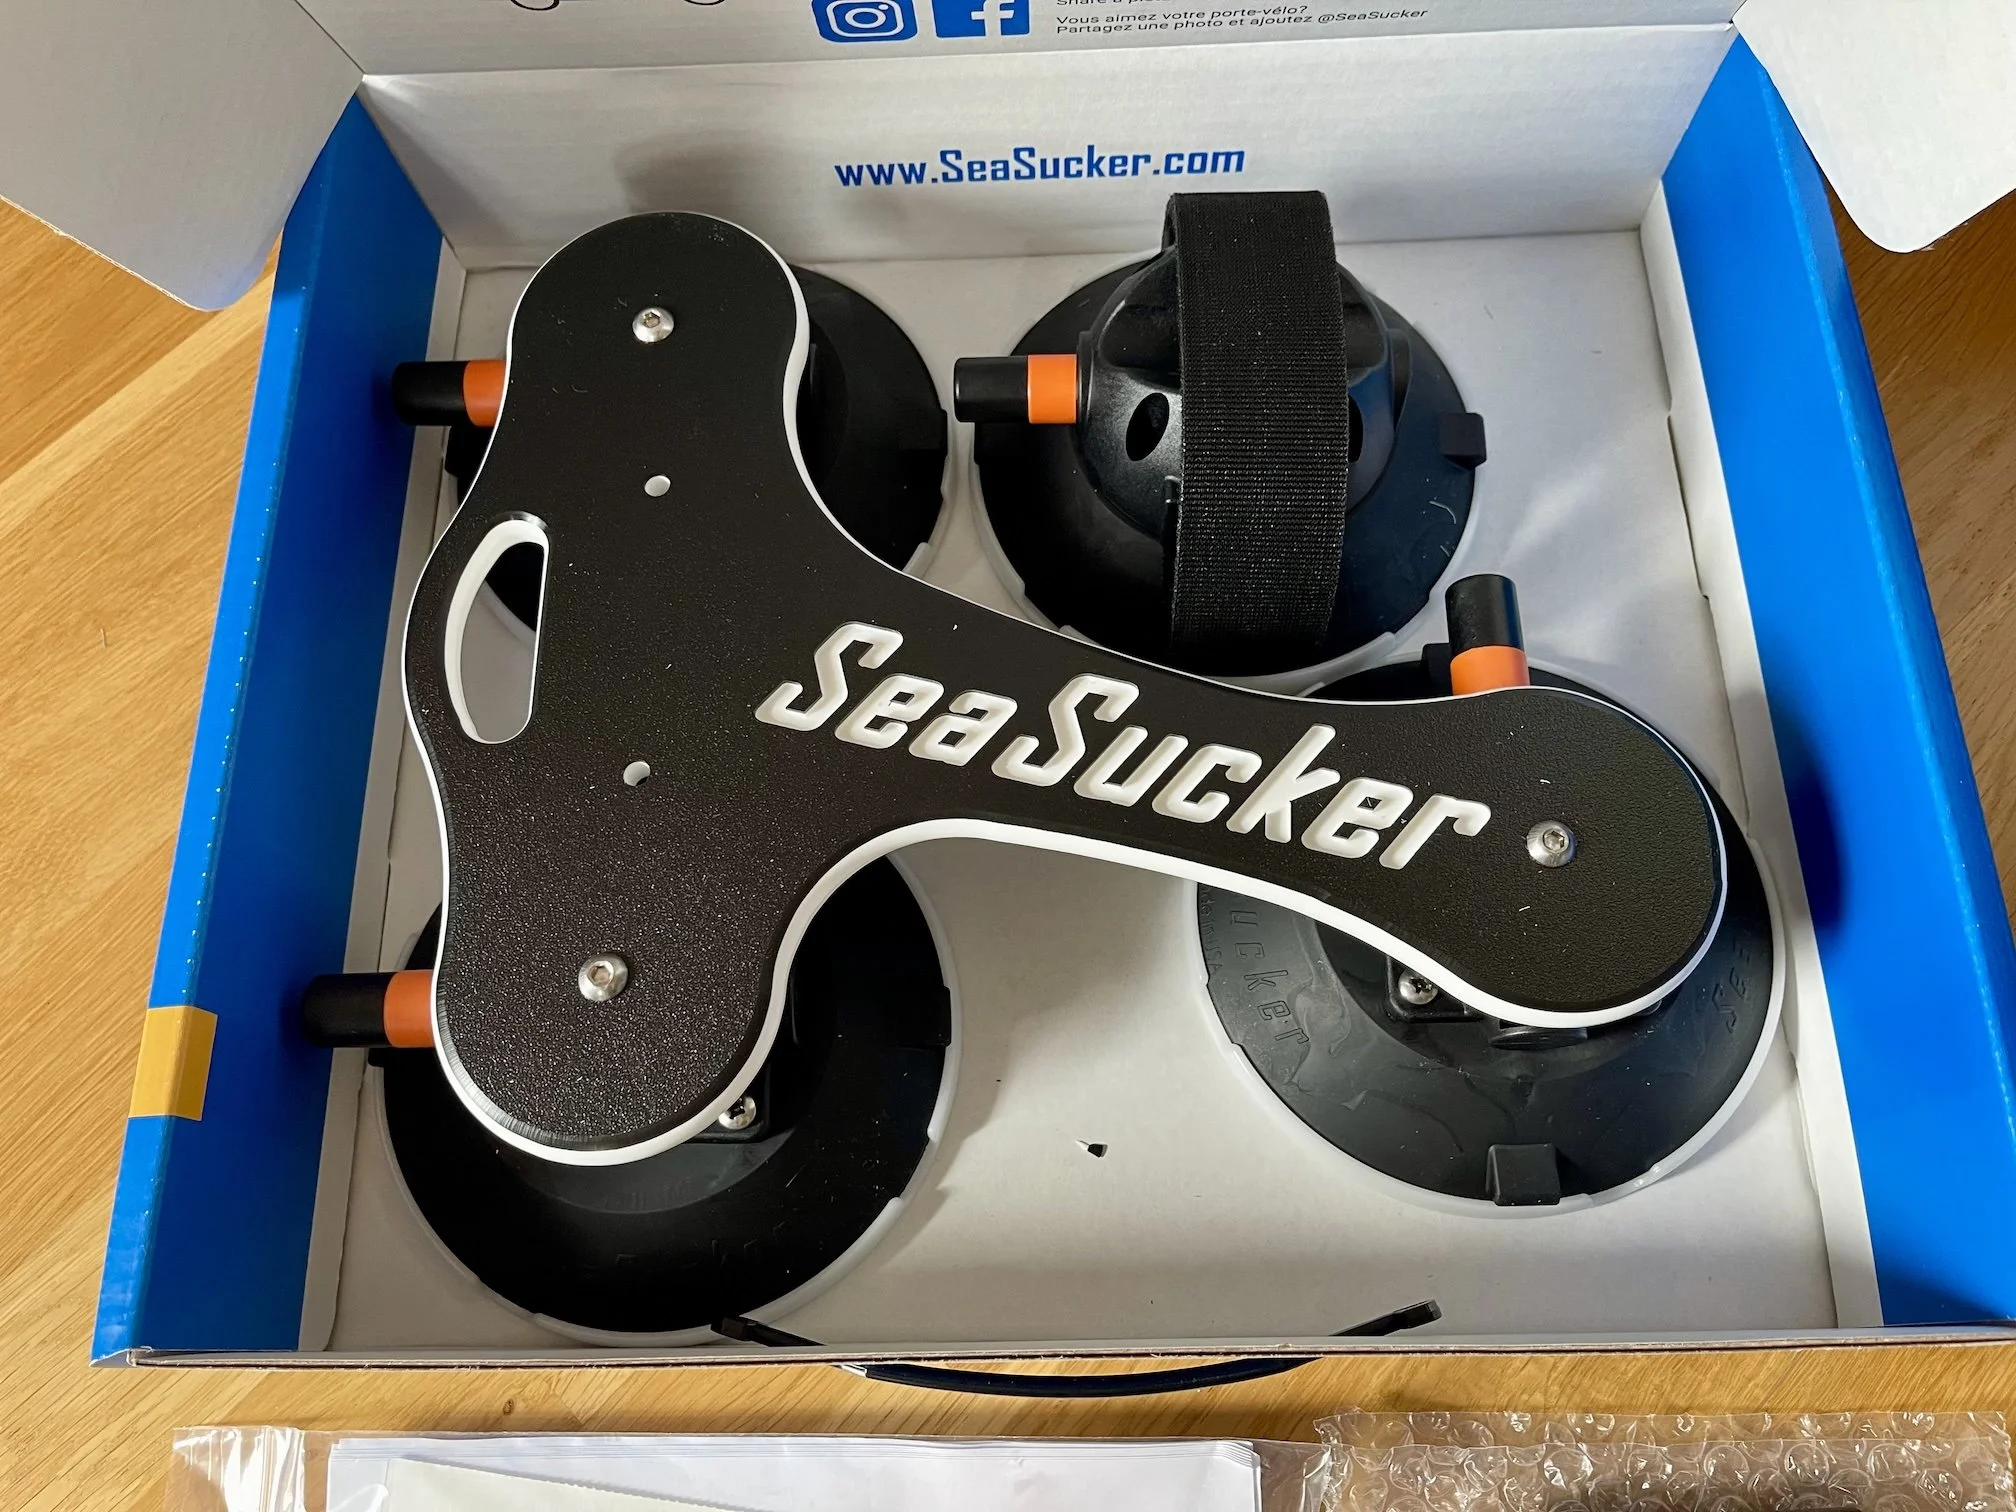

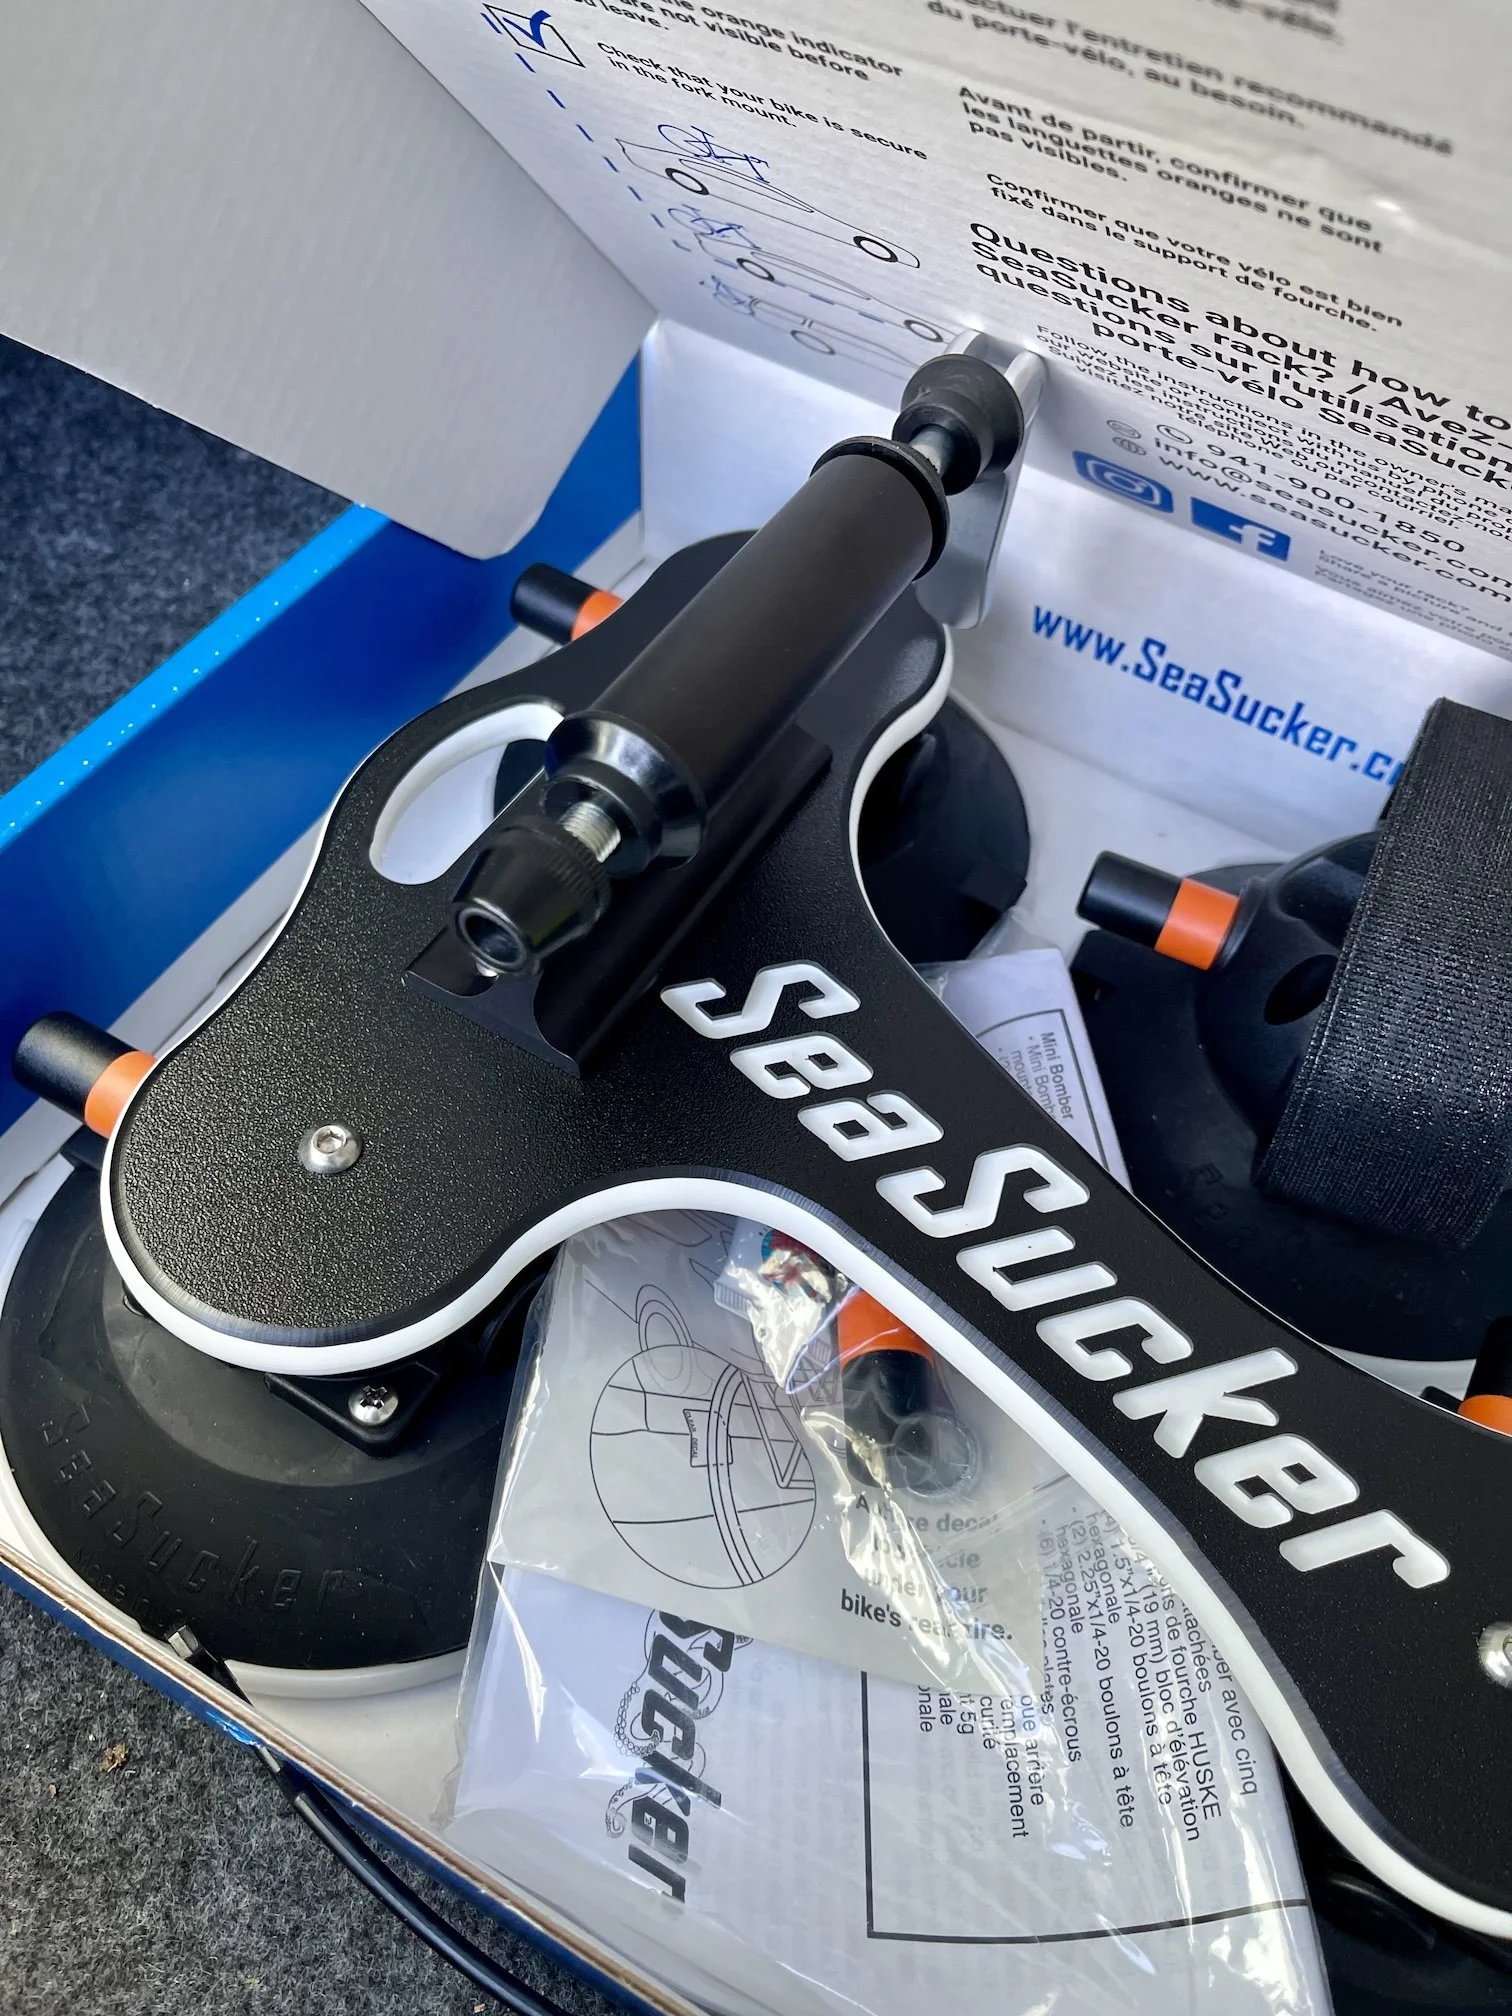
The rack came in a nice semi-reusable box with a carrying handle, which I liked. Once I had attached the HUSKE fork mount, though, the rack no longer fit in the box. I solved that by cutting a hole in the top of the box for the fork mount to stick through.
It is a small thing, but I do wish the box had been designed with the fork mount installed, since that is how I store it between trips. Alternatively, it would be nice if the fork mount was easier to detach.
Besides the rack itself, mine came with a manual, a spare vacuum pump, lubricant, a 7/16” wrench, an Allen key, and a velcro strap for securing the pedals. The quick-release axle and plugs I had to buy separately.
First mount
There is no standard location to mount the rack on the car, and it doesn’t even have to be on the roof. That means it requires some initial thought, and maybe some experimentation, to find the best spot.
I had seen people mount their Talon racks with the front mount on the rear window and the rear wheel mount on the trunk. But I wanted easy access to the trunk while the bike was mounted, so I decided to mount mine further up, with the back wheel on the rear window instead of the trunk.
Finding the right position

When deciding where to put the rack, there are several things to consider:
The surface should be relatively flat. It doesn’t have to be perfectly flat, because the plastic between the vacuum cups is designed to flex a little, but it needs to be flat enough that you can push the cups onto the surface and get the vacuum started.
There should not be any gaps where the cups sit.
The mounting surfaces need to be clean. You don’t need to clean the whole car, but you should wipe the spots where the cups will sit. I use a water bottle and a microfiber cloth.
The surface should be sturdy and not flex too much.
When you’ve found a suitable location for the front mount, you also need to make sure the rear wheel mount ends up in a good location. If not, you’ll have to adjust and try again.
The rack should be in a location where you can reach the vacuum pumps and lift the bike into place without too much trouble.
All of this can take some time and trial and error before finding a good spot. For me it took about 20 minutes the first time, but after that it only takes a few minutes since I use the same location and routine every time.
Mounting the bike

Once the rack is in place, it’s time to lift up the bike and attach it to the fork mount. This requires some careful handling if you don’t want to scratch the paint. Depending on how heavy your bike is and how high your car is, this could be the most challenging part of the installation.
Luckily for me, my car is pretty low, and while my bike is not the lightest, it’s also not e-bike heavy.
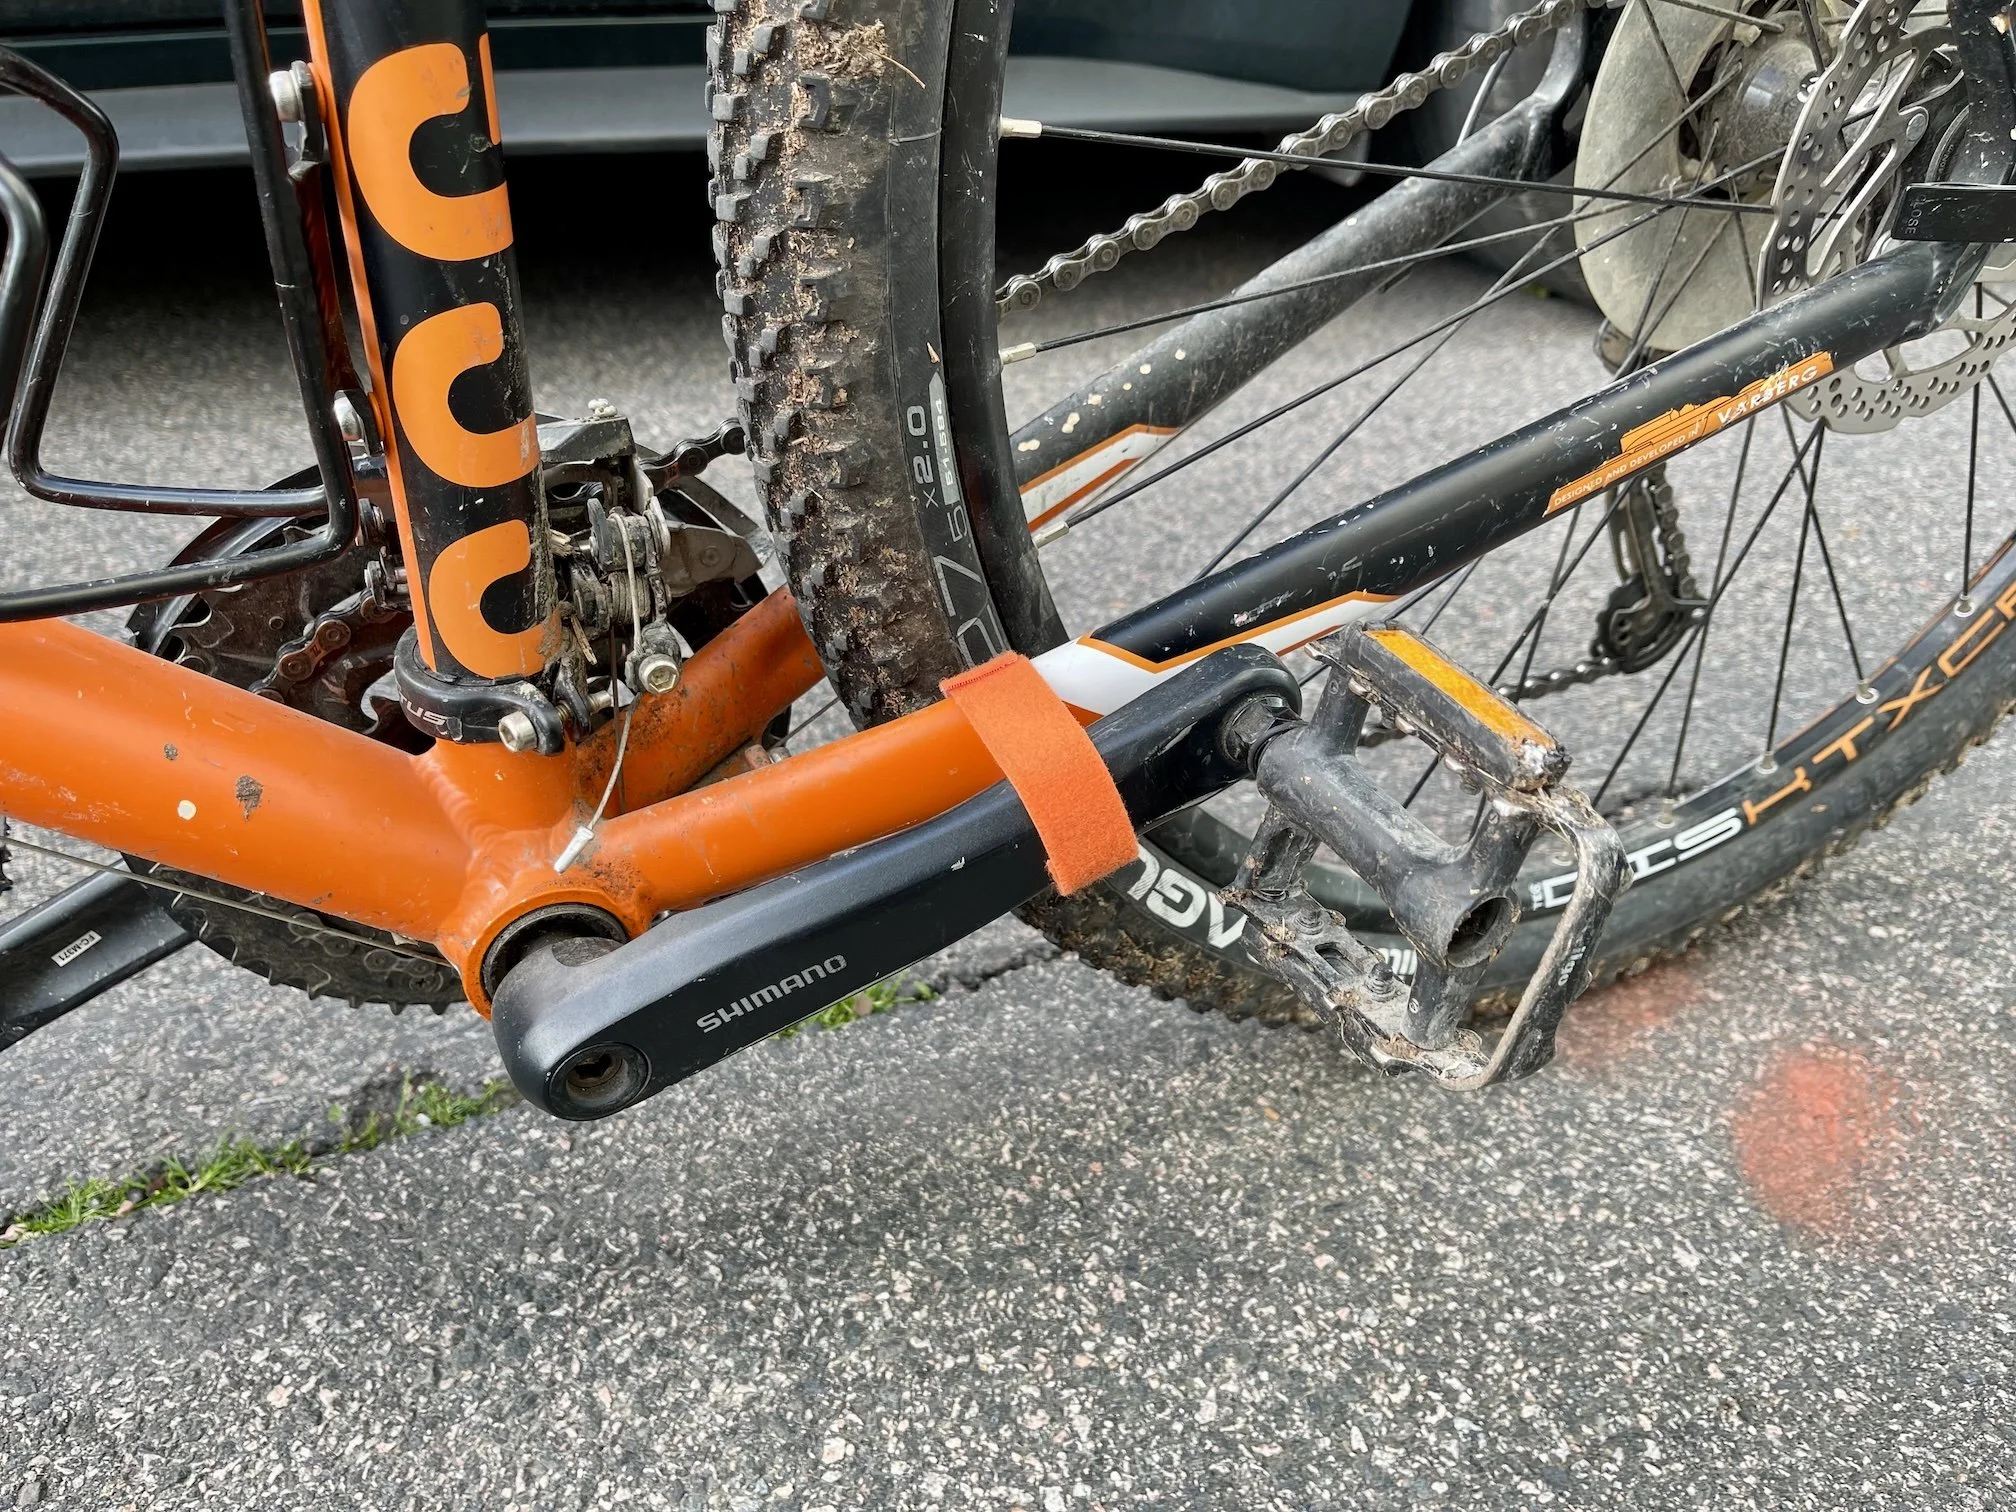
First, I strap the pedals with the included velcro strap. This prevents the pedals from moving and accidentally scratching the car. Then I open up the HUSKE quick-release screws as much as possible to make it easier to align the fork with the mount.
I remove the front wheel, grab the bike by the fork with one hand and the frame with the other, and lift it onto the roof with the fork in the fork mount. While holding a firm grip on the fork, I tighten the screws and lock the quick-release lever.
If your bike has a thru axle instead of a quick-release skewer, I imagine this would take a bit more effort.
Once the front is mounted, only the rear wheel is left. I align the rear wheel mount with the wheel, pump up the vacuum, and use the velcro strap to secure the wheel to the mount.

Final checks before driving
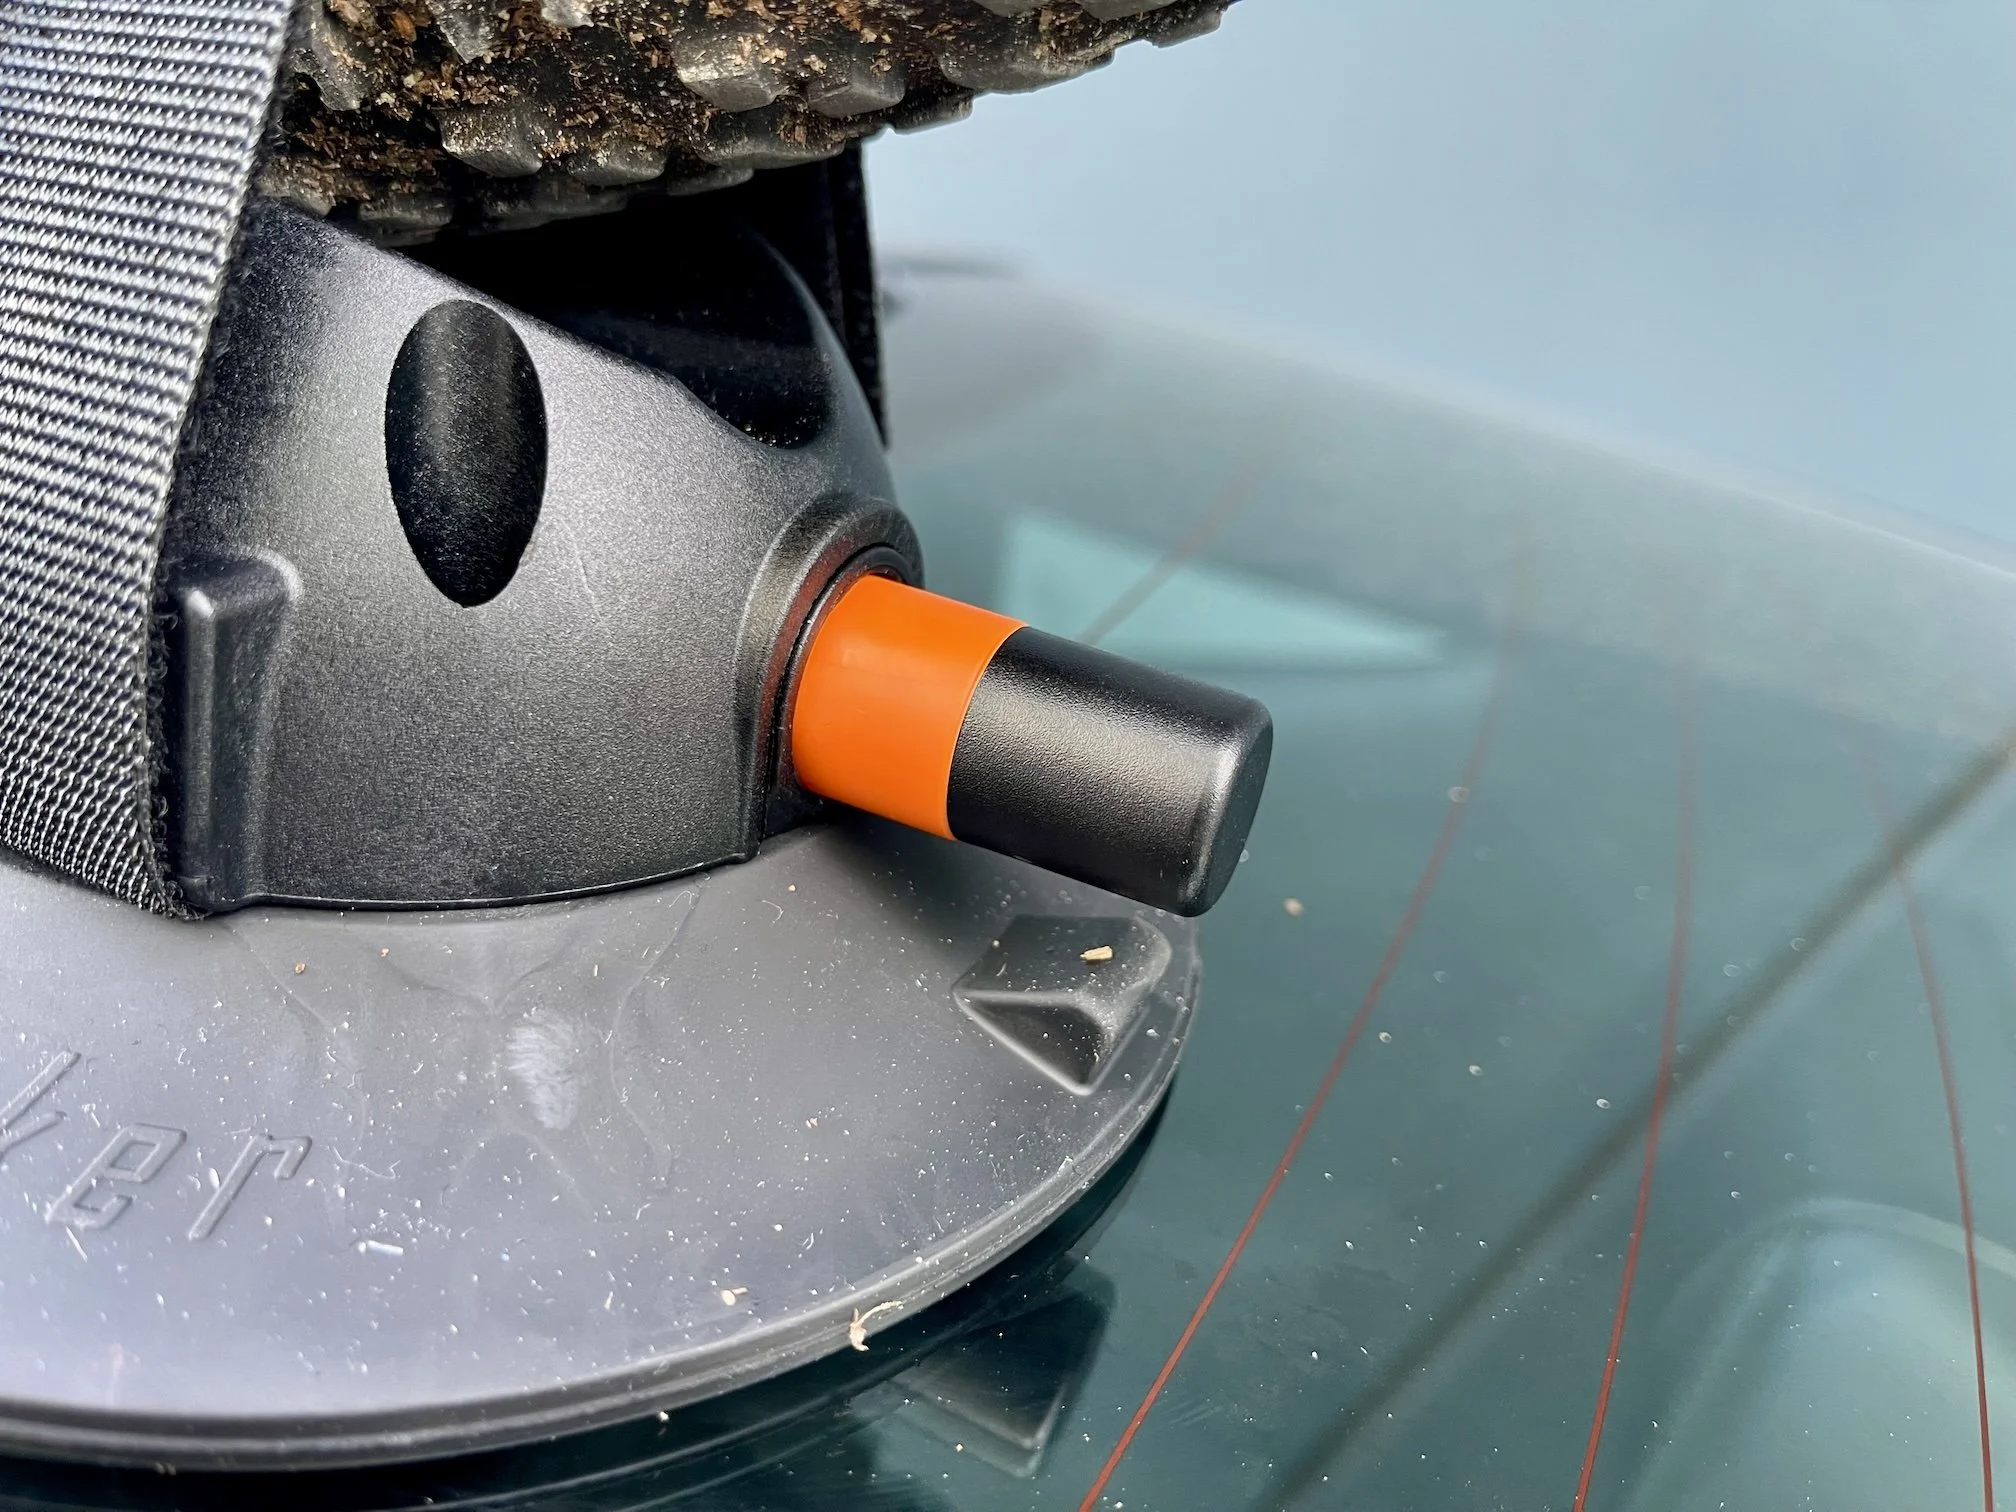
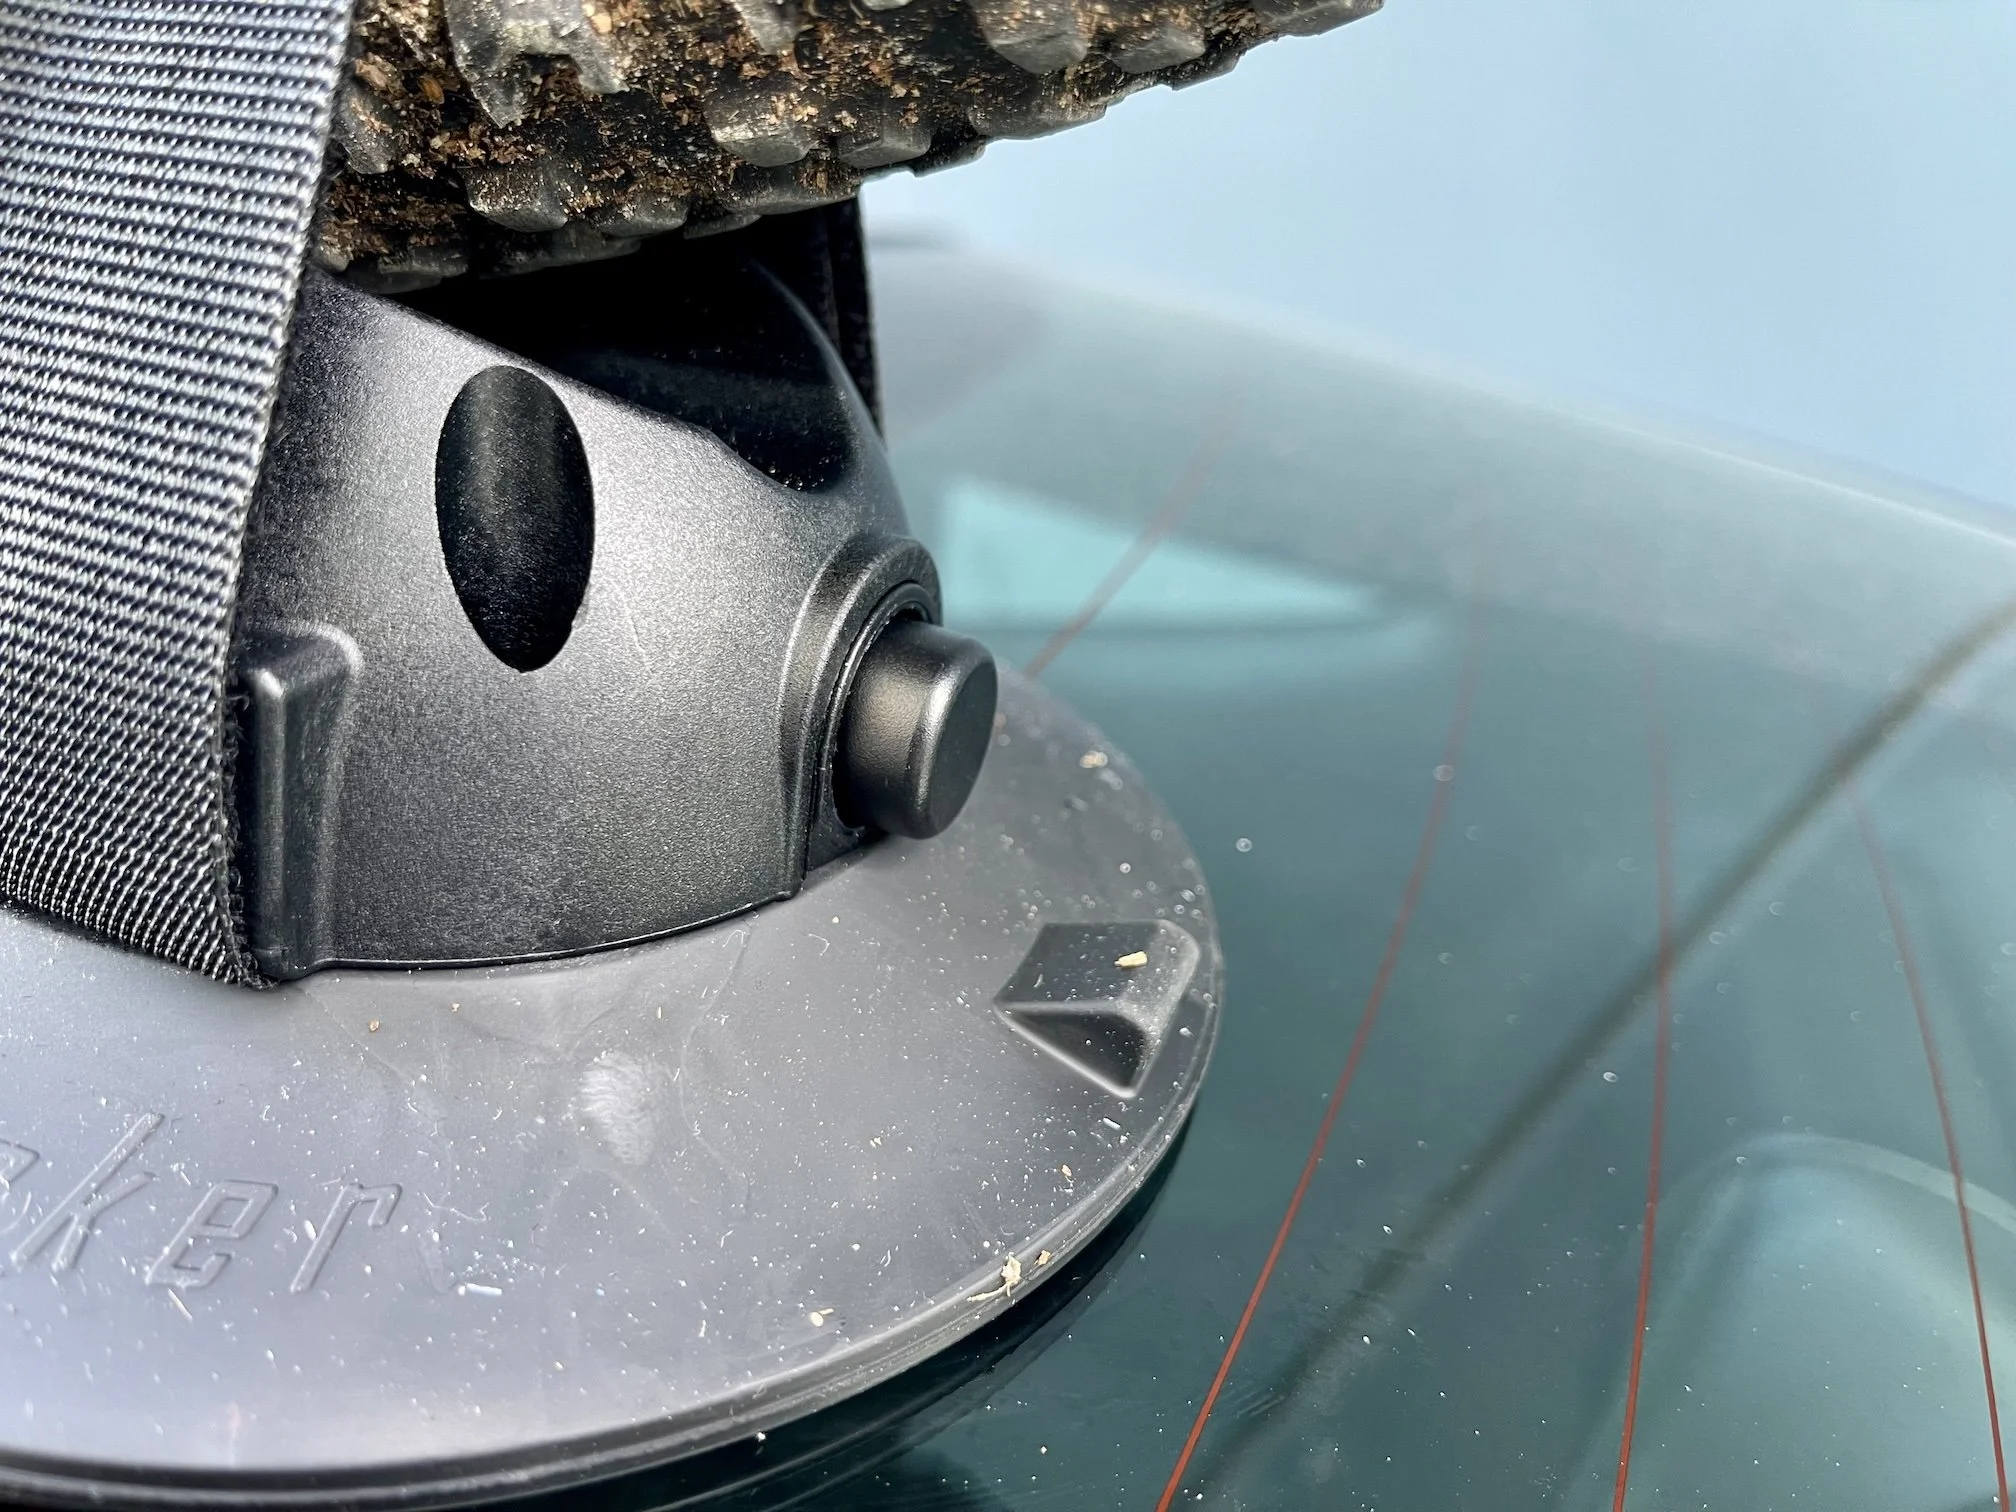
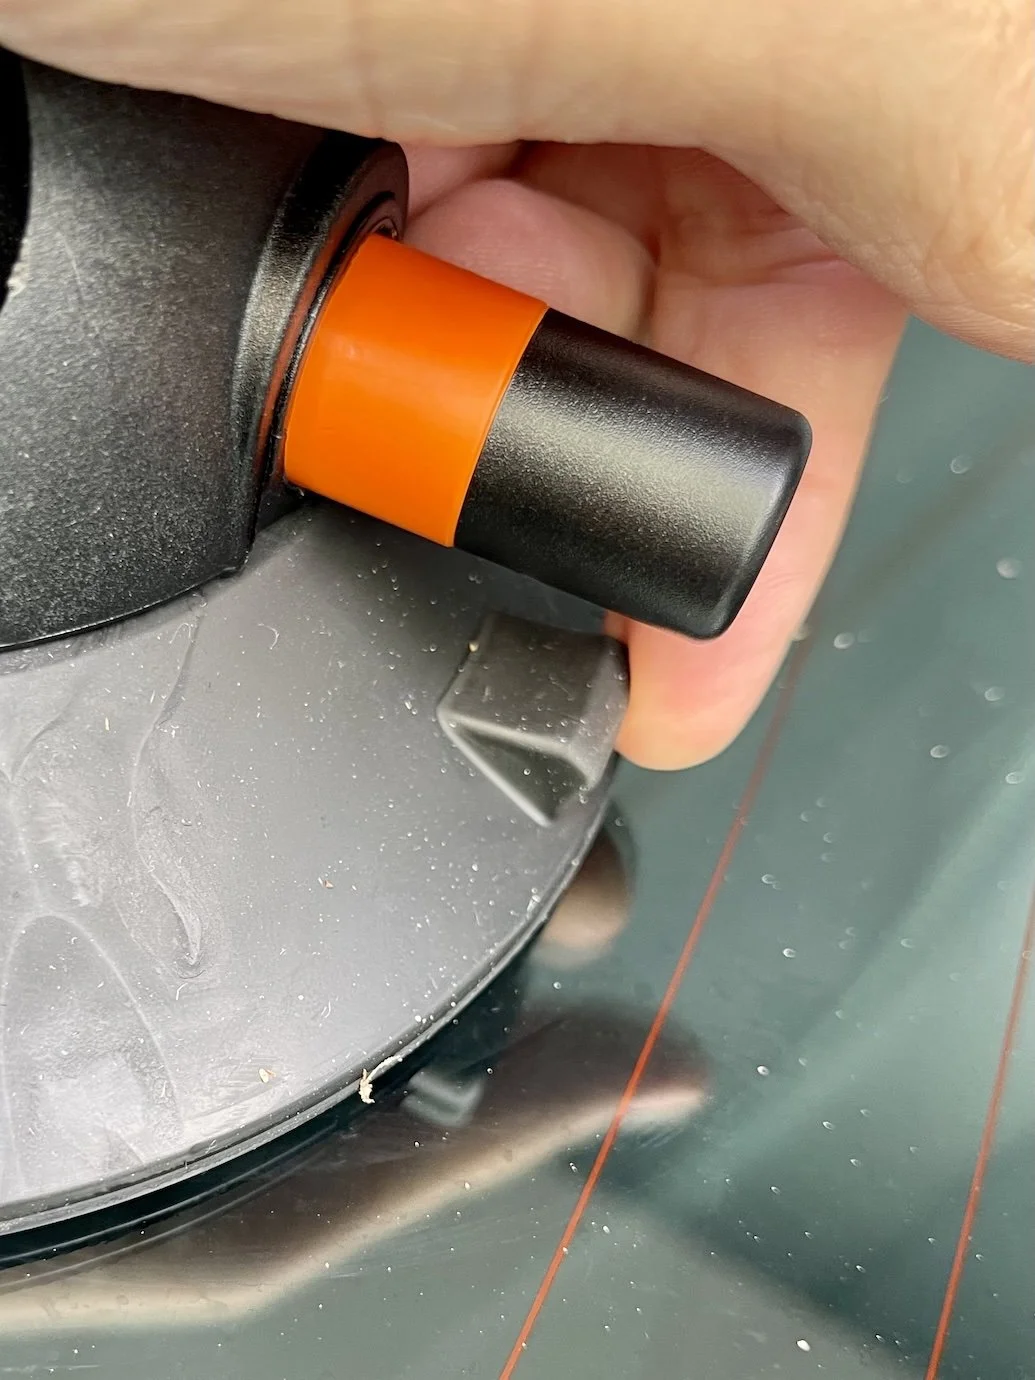
When everything is in place, I make sure the vacuum cups are fully pumped. I first pump each cup until the orange indicator is no longer visible and the plunger no longer moves out by itself. Then I manually pull the plunger out and push it back in a few more times to make sure the cups are fully pumped.
Then I wait about 10 minutes and check the vacuum indicators again before I start driving.
First drive
Did I say I was nervous? I was so nervous that I had my friend drive behind me at a safe distance for the entire one-hour trip. We also had a phone call going during the whole drive, and on top of that I stopped regularly to check the vacuum mounts.
Other than the occasional roof pop from the car roof flexing, there was really no way of telling whether the bike was still there. I couldn’t see it from the windows or rear-view mirrors, so it was a scary feeling of uncertainty.
The regular stops gave me some reassurance that the rack was working, and the more stops I did, the more confident I felt. But the anxiety never fully went away, and I was thinking about the rack for most of the drive.
My first drive included a bit of everything: city driving with speed bumps, roundabouts, and traffic lights, plus highways and curvy country roads. My destination was at about 600 ft elevation, which I was a little worried about, but the vacuum pump plungers showed no indication of vacuum loss, either on the way up or on the way home.
First unmount

Unmounting it was much easier than mounting it. I just unstrapped the rear wheel, opened the HUSKE quick-release lever, unscrewed it a bit, and lifted the bike off.
Once the bike was off, I pulled the tabs on the vacuum cups to release the vacuum and removed the mounts from the car. I also put the protective covers back on the cups before storing the rack in the car. That’s it, it took less than a minute.
It didn’t leave any permanent marks on the car, only water and dirt rings where the vacuum cups had been. I could easily remove them with a quick wipe, but I actually preferred to keep them as reference points for mounting the rack again for the return trip.
Conclusion
Overall, I really like the SeaSucker Talon 1-bike rack. It has saved me a ton of time by not having to put my bike inside the car, and it has let me keep using my Mustang for mountain biking without installing permanent roof bars, which would probably ruin the look if they were even possible.
For my use case, it works really well. It is quick to mount and unmount, easy to store, and it solves a problem that would otherwise be difficult to solve on my car.
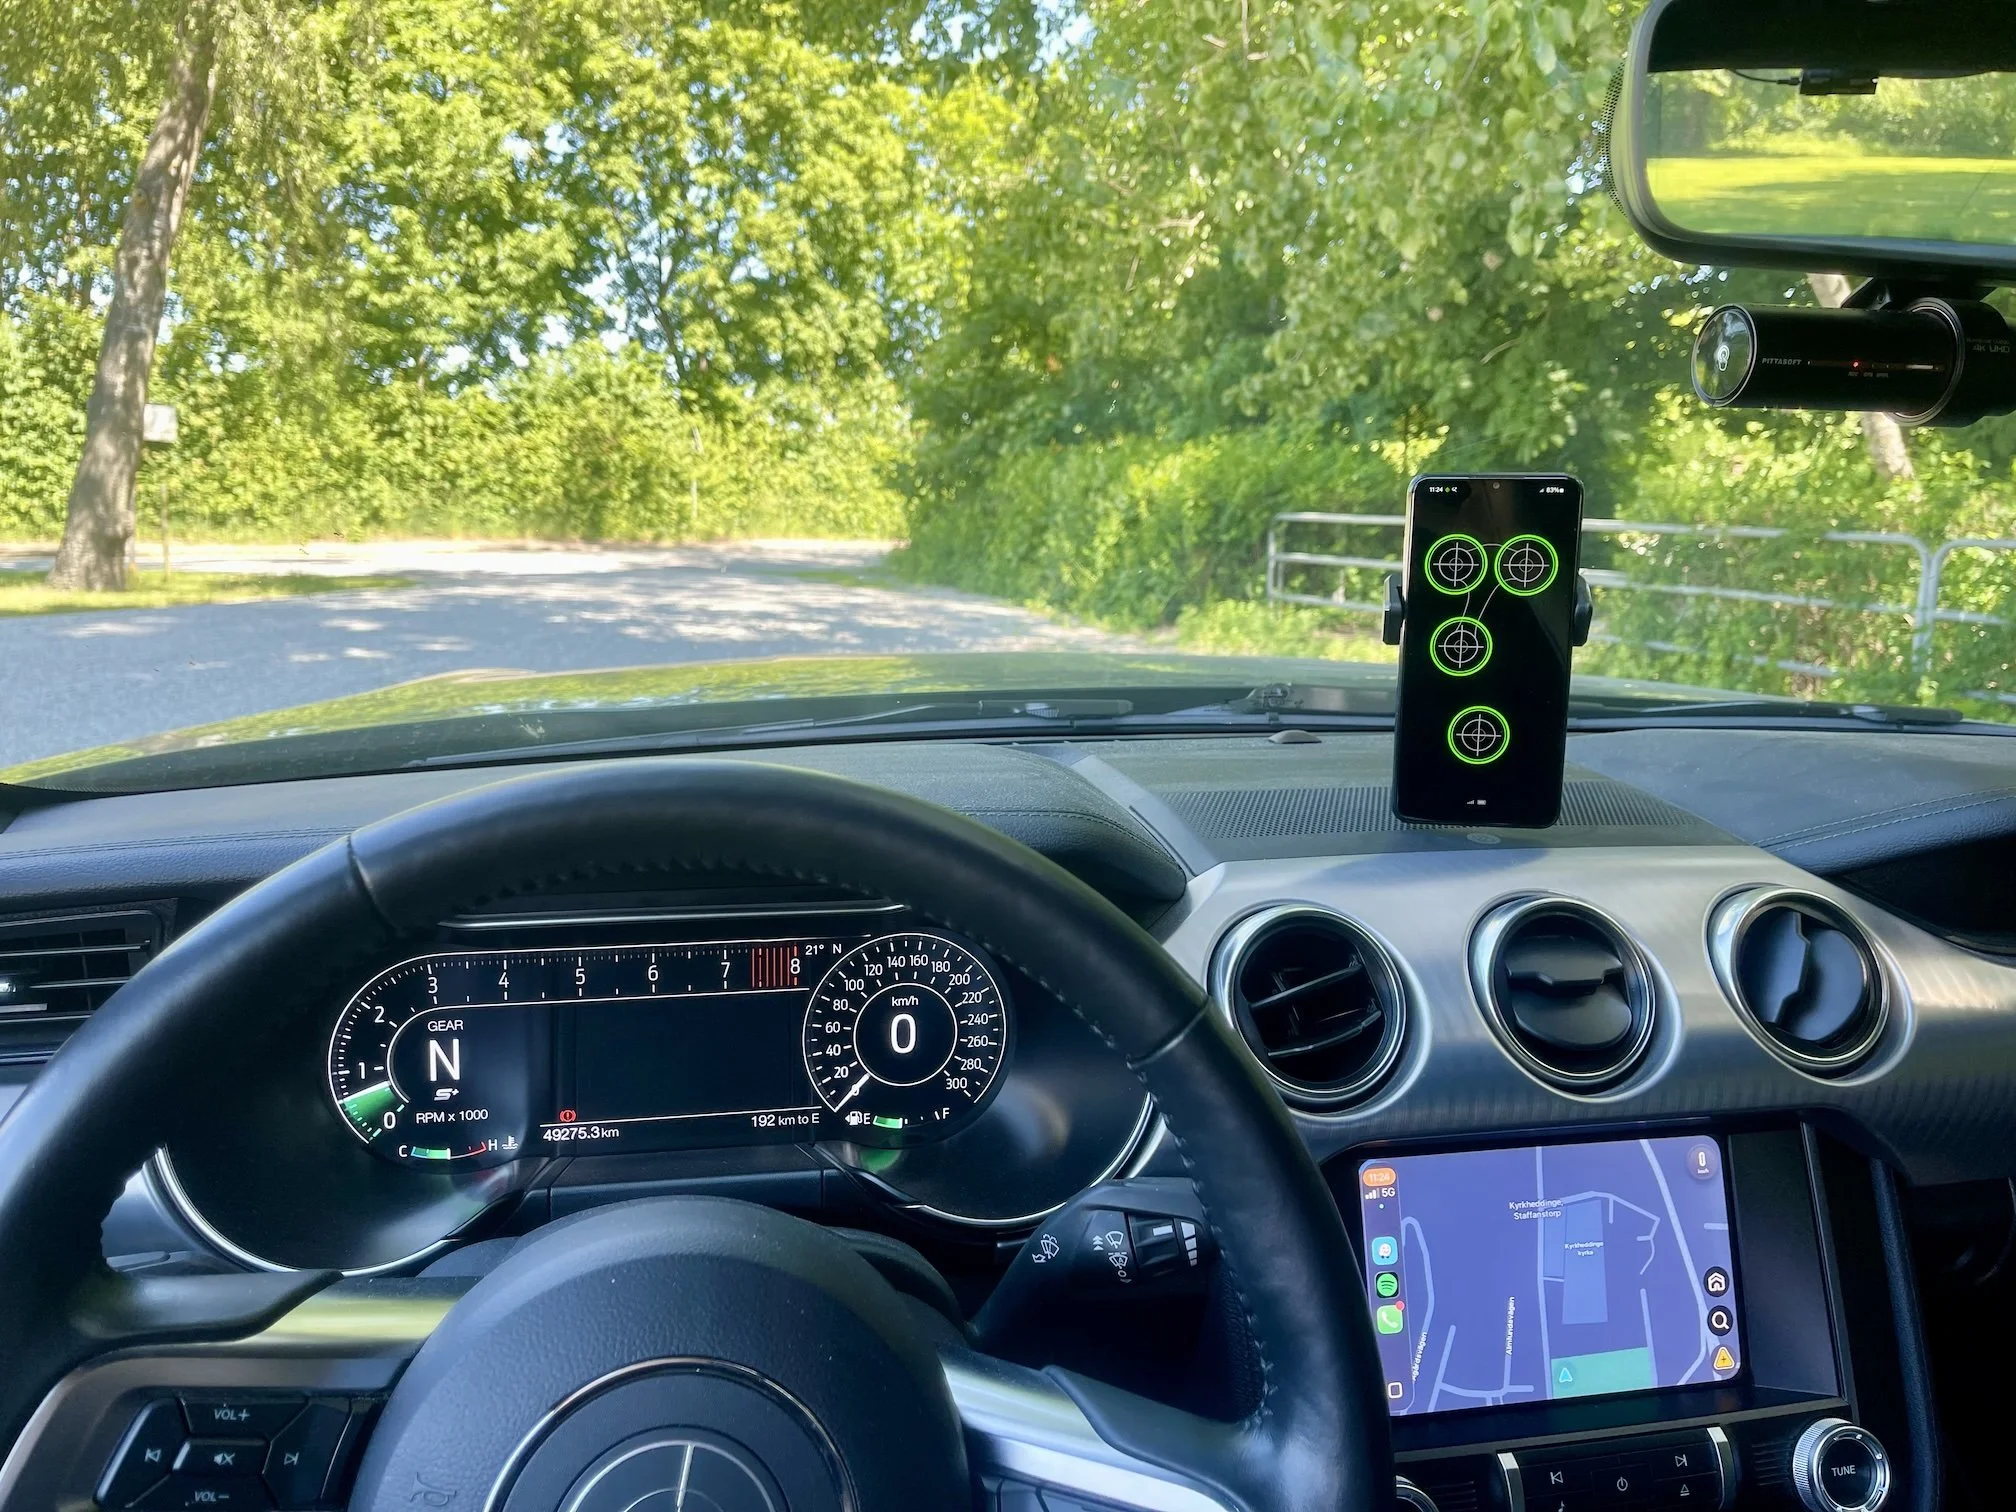
But it also takes some trust to use. The rack itself worked well, but driving with the bike on the roof made me think about the vacuum mounts constantly. I loved the product, but it felt incomplete without a way to see the status of the vacuum mounts from inside the car while driving.
That is how the idea for Kraken Rack Monitor was born. While mounting the rack for the trip home, I wondered if there was some type of add-on I could use to get alerts on my phone if one of the mounts started losing vacuum. There wasn’t, so I spent the next couple of weeks making my own.
And when I tested it for the first time, it completely changed the driving experience. The Talon finally felt like the rack I wanted it to be: removable, convenient, and much less stressful to drive with.